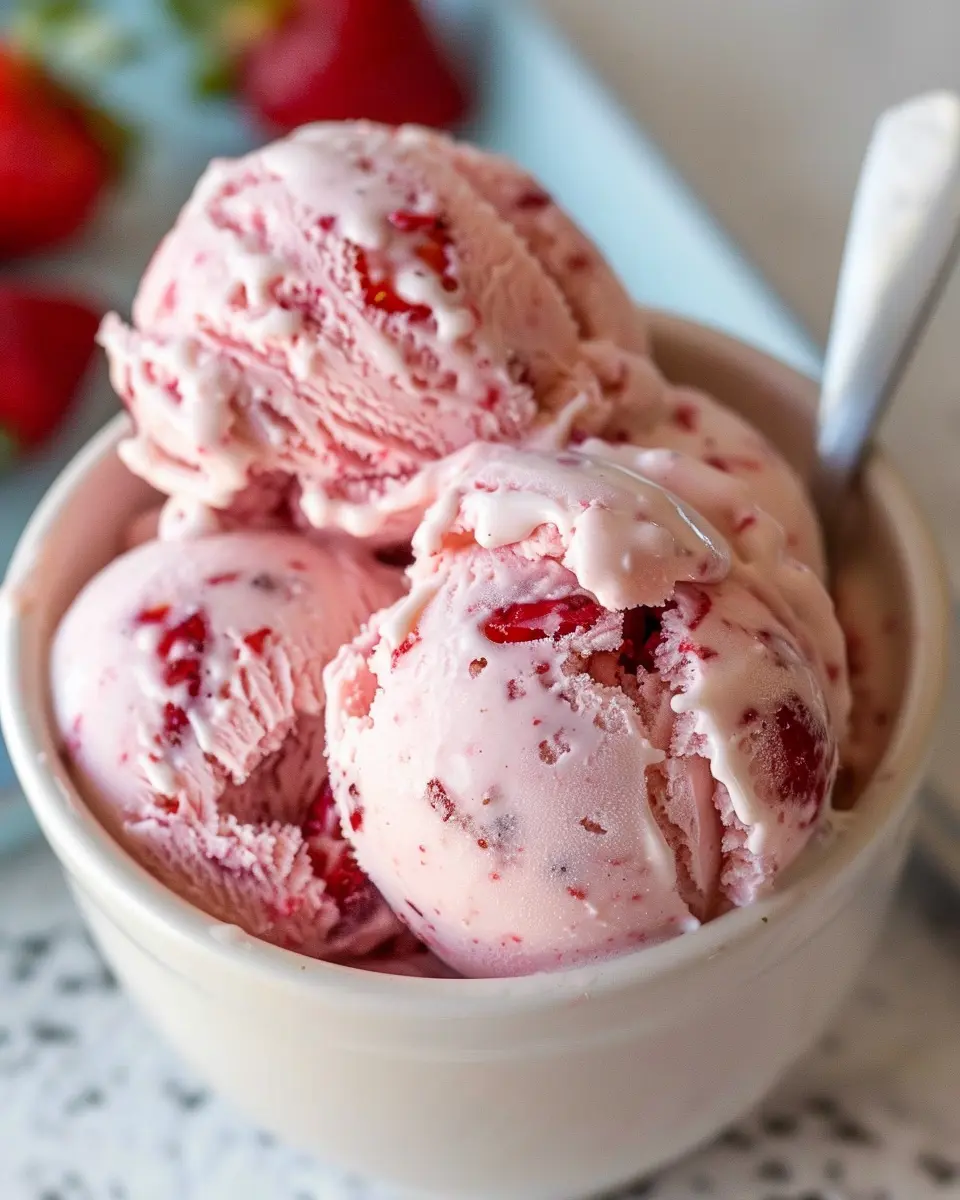
Introduction to Homemade Strawberry Ice Cream
There’s something special about creating your own ice cream at home, and homemade strawberry ice cream truly captures that vibrant, fresh flavor reminiscent of sun-soaked summer days. While store-bought options are convenient, making your own version opens up a world of flavor and texture that you simply can’t find on the supermarket shelves. Why settle for artificial flavors and preservatives when you can whip up a batch using fresh, ripe strawberries and a few simple ingredients?
Why Choose Homemade Over Store-Bought Ice Cream?
-
Quality Ingredients: When you make homemade strawberry ice cream, you control what goes into it. You can choose organic strawberries, high-quality cream, and all-natural sweeteners. No hidden ingredients or unwanted additives!
-
Customization: One of the best parts about making ice cream at home is the ability to customize. Want it extra creamy? Add more heavy cream. Prefer a lighter version? Use yogurt instead! You can adjust flavors and mix-ins to suit your preferences. Add a touch of vanilla or a hint of lemon zest for that extra zing!
-
Freshness Matters: There’s no comparison to the taste of fresh ingredients. Store-bought ice cream often relies on flavors that have been sitting on the shelf for months. In contrast, when you make your own, you’ll experience the rich, vibrant essence of freshly-picked strawberries.
-
Fun Activity: Making ice cream can be a delightful and fun-filled activity, especially if you involve friends or family. It’s a great way to reconnect while enjoying a delicious reward at the end. Picture this: a warm day, blending up fresh strawberries in the kitchen, and laughing together as you create something delicious!
-
Healthier Options: You can make healthier variations of homemade strawberry ice cream by reducing sugar or utilizing alternative sweeteners. If you’re looking to indulge without the guilt, you can experiment with lighter ingredients without sacrificing flavor.
If you’re intrigued, check out websites like Serious Eats for additional tips on perfecting ice cream textures and flavors. They offer in-depth insights that can elevate your homemade creations! Now, let’s dive into the delightful world of making your own ice cream. It’s easier than you think and oh-so-rewarding!
Ingredients for Homemade Strawberry Ice Cream
Creating the perfect homemade strawberry ice cream starts with the right ingredients. Whether you’re indulging in a sweet treat on a hot summer day or impressing friends at a backyard gathering, having quality ingredients will ensure a creamy delight. Here’s what you’ll need:
Essential Ingredients for a Creamy Texture
- Fresh Strawberries: Aim for ripe, sweet strawberries for the best flavor. About 2 cups will do!
- Heavy Cream: To achieve that luscious, creamy texture, 1 cup of heavy cream is essential.
- Whole Milk: Use 1 cup for added richness and to balance the creaminess.
- Sugar: About 3/4 cup of granulated sugar should suffice to sweeten things up.
- Vanilla Extract: A dash adds depth to the flavor profile, enhancing your homemade strawberry ice cream.
Optional Ingredients for Added Flavor
- Lemon Juice: A tablespoon of fresh lemon juice can brighten the taste.
- Mint Leaves: Chopped finely, they add a refreshing twist.
- Chocolate Chips: For those who like a mix of flavors, why not fold in some chips?
For more tips on selecting ripe strawberries, check out this expert strawberry guide. Happy ice cream making!
Preparing Homemade Strawberry Ice Cream
Making your own homemade strawberry ice cream is not just a delightful summer treat; it’s a rewarding experience that fills your kitchen with the sweet scent of fresh strawberries. Let’s dive into the fun and simple steps needed to create this delicious dessert!
Step 1: Prepare the strawberries
The star ingredient of our homemade strawberry ice cream is, of course, the strawberries! Choose ripe, juicy strawberries for the best flavor. Here’s how to prepare them:
- Wash your strawberries gently under cool running water.
- Hull them by removing the green tops, using a small knife to cut away the stems.
- Slice the strawberries into halves or quarters, depending on their size to help release their juices.
Allow them to sit for a few minutes to absorb the freshness, or you can even macerate them by sprinkling a little sugar over the strawberries and letting them sit for about 30 minutes. This will draw out their natural juices and enhance the flavor even more.
Step 2: Create the strawberry mixture
Once your strawberries are ready, it’s time to blend them into a smooth mixture. This step is crucial as it adds a lovely texture to your ice cream.
- Add the strawberries to a blender or food processor.
- Include sugar (about 1/2 cup) and a squeeze of lemon juice to brighten their flavor.
- Blend until smooth but leave a few chunks for that homemade feel.
The result should be a delicious, vibrant puree that you can’t resist tasting! Feel free to check out health benefits of strawberries for a little extra motivation on why this juicy fruit is worth including in your diet.
Step 3: Combine with cream and vanilla
Next, we’ll mix our strawberry puree with cream and vanilla to create a rich mixture.
- In a mixing bowl, combine 2 cups of heavy cream and 1 cup of whole milk. Whisk them together until well blended.
- Stir in the strawberry puree along with a tablespoon of pure vanilla extract. This adds a lovely depth of flavor that pairs perfectly with strawberries.
Don’t skimp on the vanilla, as this will mellow the sweetness of the strawberries while enhancing the overall flavor of the ice cream.
Step 4: Churn the ice cream
After blending everything together, it’s time for the fun part: churning!
- Pour the mixture into an ice cream maker, following the manufacturer’s instructions.
- Churn the mixture for 20-25 minutes, or until it thickens into a soft serve consistency.
If you don’t own an ice cream maker, don’t worry! You can pour the mixture into a shallow container and stir it every 30 minutes until it reaches the desired texture.
Step 5: Freeze for that perfect scoop
Finally, we’ll freeze our ice cream to achieve that perfect scoopable texture.
- Transfer your churned ice cream into an airtight container.
- Cover it tightly and leave it in the freezer for at least 4 hours—or overnight, if you can resist—until fully set.
When it’s time to serve, take it out of the freezer and let it sit for a couple of minutes to soften slightly before scooping. Pair it with fresh strawberries or a drizzle of chocolate syrup for a treat that’s hard to beat!
With these steps, you’ll be able to whip up your very own homemade strawberry ice cream that’s bursting with flavor and made with love. Happy churning!
Variations on Homemade Strawberry Ice Cream
Homemade strawberry ice cream is a timeless favorite, but why stop at the classic when you can explore delicious variations? Below are two refreshing twists that will elevate your dessert game and impress your friends and family.
Strawberry Banana Swirl Ice Cream
If you’re a fan of the dynamic duo of strawberries and bananas, this variation is calling your name. The combination creates a creamy, fruity symphony that’s hard to resist!
To make it:
- Prepare your homemade strawberry ice cream base as usual.
- Simply mash 1 ripe banana and fold it into the mixture before churning.
- For a stunning presentation, create swirls of pureed strawberries mixed with banana in your ice cream before the final freeze.
This not only adds sweetness but also a bit of a tropical vibe. Plus, bananas are a great source of potassium and fiber, making your treat feel a tad healthier!
Strawberry Mint Ice Cream
Looking to add a refreshing twist to your homemade dessert? Strawberry mint ice cream combines the sweetness of strawberries with a burst of fresh mint for an invigorating flavor!
Here’s how to create it:
- Infuse your cream base with fresh mint leaves by steeping them in warm cream for about 30 minutes. Strain the leaves, then add your usual strawberry ingredients.
- For an extra minty kick, toss in a handful of finely chopped mint leaves when mixing everything together.
This indulgent icy treat not only looks fantastic but also offers a surprising flavor that’s perfect for cooling off in the summer. Want more inspiration? Check out Bon Appétit for creative takes on frozen desserts!
These variations transform your basic homemade strawberry ice cream into something truly special. Give them a whirl and discover your new favorite frozen treat!
Cooking tips and notes for Homemade Strawberry Ice Cream
Tips for selecting fresh strawberries
Choosing the right strawberries is crucial for crafting the best homemade strawberry ice cream. Look for berries that are bright red with a natural shine—this indicates freshness. Avoid any with green or white patches, as they might not be fully ripe. Always check for soft spots or mold; those can ruin your batch! When you get them home, keep your strawberries in the fridge, but remember to wash them just before use. An excellent resource for selecting fruits is the USDA’s Produce Guide.
How to ensure a creamy texture
The key to a velvety homemade strawberry ice cream is in the preparation. Ensure you thoroughly blend the strawberries into a smooth puree, as this will help incorporate air and enhance creaminess. Don’t forget to chill the mixture before churning—it helps with texture! A common pitfall is over-churning, which can lead to ice crystals. Keep an eye on it and stop once you achieve that luscious, soft-serve consistency. You can also add a touch of heavy cream for extra creaminess!

Serving Suggestions for Homemade Strawberry Ice Cream
Pairing with Desserts
When it comes to homemade strawberry ice cream, the world of desserts opens up a delightful array of pairing possibilities. Consider serving a generous scoop alongside a warm slice of chocolate cake or on top of a buttery shortcake for a classic treat. The creamy, fruity flavor of your ice cream beautifully contrasts with rich desserts, creating a satisfying balance.
For a lighter option, why not serve it with fresh berries or a sprinkle of granola? This not only offers a burst of flavor but also adds an appealing crunch, making your dessert both visually striking and delicious. You could also layer your homemade strawberry ice cream in a dessert parfait with yogurt and granola for a refreshing morning treat.
Creative Serving Ideas
Think outside the bowl! Instead of a traditional scoop, consider making ice cream sandwiches with cookies or using waffle cones for a fun, portable option. For gatherings, you might even set up a DIY sundae bar. Provide toppings like chopped nuts, caramel sauce, and even turkey bacon bits for those adventurous diners. This interactive element turns dessert into an experience, encouraging mingling and creativity among your guests.
Whether you’re enjoying it solo or serving friends, these ideas can elevate your homemade strawberry ice cream experience. What will you try first? Check out more creative ideas from Food Network or Bon Appétit!
Time breakdown for Homemade Strawberry Ice Cream
Creating your own homemade strawberry ice cream is both a fun and rewarding experience! Here’s a quick time breakdown to help you plan:
Preparation time
Start by dedicating about 15–20 minutes for preparation. This includes washing, hulling, and blending your strawberries, as well as mixing all the ingredients together. It’s a great time to get the kids involved or to crank up your favorite playlist!
Chilling time
You’ll need to allow about 3–4 hours for chilling the mixture. This is crucial for achieving that creamy texture, so don’t rush this step. If you’re making this on a warm day, you could even chill the mixture overnight for best results.
Total time
Overall, expect to spend around 4–5 hours total, including active and inactive time. Once the chilling is done, just churn your mixture, and you’ll be enjoying a delicious bowl of homemade strawberry ice cream in no time!
For more tips on the process, check out this guide on making ice cream at home. Happy churning!
Nutritional Facts for Homemade Strawberry Ice Cream
Creating your own homemade strawberry ice cream isn’t just about indulging in a delightful treat; it’s also an opportunity to consider its nutritional content.
Calories
A typical serving of homemade strawberry ice cream holds around 150-200 calories. This can vary based on your ingredient choices, like whether you use heavy cream or a lighter milk alternative.
Sugar Content
You might be surprised, but homemade versions often contain less sugar than store-bought varieties. On average, you can expect approximately 15-25 grams of sugar per serving, depending on how sweet your strawberries are and if you add extra sweeteners.
Protein
Regarding protein, this icy treat usually provides about 2-3 grams per serving. If you’re making your homemade strawberry ice cream with yogurt or milk, that protein content can go up a notch!
By understanding these nutritional aspects, you can enjoy your frozen delight with a bit more insight. For more detailed nutritional breakdowns, consider reputable dietary sources like the USDA FoodData Central and Nutrition.gov. Enjoy crafting this delicious dessert!
FAQs about Homemade Strawberry Ice Cream
Can I use frozen strawberries?
Absolutely! Using frozen strawberries is a great alternative and can actually be a time-saver. Just make sure to thaw them slightly before blending. This way, you’ll still get that sweet, fruity flavor in your homemade strawberry ice cream. Frozen fruits can sometimes be even sweeter than fresh ones, and they’re often available year-round, making it easier to whip up this delicious treat any time you crave it.
How long will it last in the freezer?
When properly stored in an airtight container, your homemade strawberry ice cream can last in the freezer for up to two weeks. However, for the best flavor and texture, try to enjoy it within the first week. Ice cream can develop ice crystals over time, making it less creamy. If you notice any changes in texture or flavor, it might be best to let it go—you want that delightful, fresh strawberry taste!
What if I don’t have an ice cream maker?
No worries! You can still create your own homemade strawberry ice cream without an ice cream maker. Just blend your ingredients until smooth, pour the mixture into a shallow dish, and place it in the freezer. Every 30 minutes, stir it vigorously with a fork to break up ice crystals. Repeat this for about 2–3 hours, and you’ll have a scrumptious, creamy ice cream that rivals the machine-made version!
If you’re curious to explore more about the science behind making ice cream without a machine, check out resources from the Ice Cream Institute for expert tips.
Conclusion on Homemade Strawberry Ice Cream
Final Thoughts and Encouragement to Try Making It at Home
Creating your own homemade strawberry ice cream is not just rewarding, it’s a delightful journey that fills your kitchen with the sweet smell of summer. With just a few simple ingredients—ripe strawberries, cream, and a touch of sugar—you can craft a treat that’s fresher and richer than anything store-bought.
Don’t worry if you’re new to ice cream making; the process is straightforward and forgiving. Plus, it’s a fun activity to share with friends or family. Imagine enjoying a scoop while reminiscing about your favorite summer memories! So grab those strawberries, and let’s make some delicious homemade ice cream. You won’t regret it! For more tips on perfecting your ice cream skills, check out this resource on ice cream techniques.
PrintHomemade Strawberry Ice Cream: Indulge in Creamy Delight
Enjoy a delicious and creamy homemade strawberry ice cream that will delight your taste buds.
- Prep Time: 15 minutes
- Cook Time: 0 minutes
- Total Time: 4 hours 15 minutes
- Yield: 4 servings 1x
- Category: Dessert
- Method: Churning
- Cuisine: American
- Diet: Vegetarian
Ingredients
- 2 cups fresh strawberries, hulled and sliced
- 1 cup heavy cream
- 1 cup whole milk
- 3/4 cup granulated sugar
- 1 teaspoon vanilla extract
- 1/2 teaspoon lemon juice
Instructions
- In a mixing bowl, combine the sliced strawberries and sugar. Let them sit for about 10 minutes to release their juices.
- In another bowl, whisk together the heavy cream, whole milk, vanilla extract, and lemon juice.
- Add the strawberry mixture to the cream mixture and stir until well combined.
- Pour the mixture into an ice cream maker and churn according to the manufacturer’s instructions.
- Once the ice cream reaches a soft-serve consistency, transfer it to a lidded container and freeze for at least 4 hours before serving.
Notes
- For a smoother texture, puree the strawberries before adding them to the mixture.
- Make sure all ingredients are chilled before mixing for the best results.
Nutrition
- Serving Size: 1/2 cup
- Calories: 120
- Sugar: 15g
- Sodium: 50mg
- Fat: 7g
- Saturated Fat: 4g
- Unsaturated Fat: 2g
- Trans Fat: 0g
- Carbohydrates: 15g
- Fiber: 1g
- Protein: 2g
- Cholesterol: 30mg
Keywords: Homemade Strawberry Ice Cream, ice cream, dessert, strawberry dessert