Introduction to Dutch Oven Sourdough Bread
If you’ve ever wandered through a bakery and been captivated by the aroma of freshly baked bread, you might be intrigued by making your very own right at home. The Dutch oven sourdough bread recipe is not just a culinary endeavor; it’s a joy-filled experience that can elevate your home cooking and impress your friends. For young professionals, balancing work with personal aspirations can make homemade bread feel unattainable. But here’s the good news: sourdough is not as complicated as it seems!
Why Sourdough Bread is a Game-Changer for Young Professionals
Picture this: you come home after a long day, and instead of microwaving leftovers, you’re pulling a beautifully crusty loaf of sourdough from your oven. The satisfaction isn’t just in the taste; it’s in the process. Making sourdough encourages mindfulness and creativity—both crucial elements when juggling a busy lifestyle. Research shows that cooking at home can lower stress levels and enhance well-being, which is a win-win for anyone tackling the challenges of modern life (Harvard Health).
Plus, making your own sourdough provides an excellent opportunity to impress your friends. Imagine hosting a casual gathering, serving warm slices of homemade sourdough paired with creamy butter or a tasty spread while you chat about the latest shows. It’s a conversation starter!
And let’s not forget the nutritional benefits! Homemade sourdough is often easier to digest than store-bought bread, thanks to the fermentation process. It’s rich in probiotics and helps promote gut health, which is significantly important for those of us burning the candle at both ends.
The Joy of Baking and Sharing
Aside from being an amazing way to unwind, sourdough baking invites community. You might find yourself swapping starter culture with friends or sharing loaves with neighbors. Building connections over food is a timeless tradition, and there’s something truly special about sharing the fruits of your labor.
So, whether you’re a baking novice or have dabbled in bread-making before, this Dutch oven sourdough bread recipe is your gateway to a gratifying and delicious hobby. Let’s take this journey together and create something that reflects your unique tastes!
Ingredients for Dutch Oven Sourdough Bread
When it comes to creating the perfect loaf, understanding your ingredients is key. Let’s dive into the essential components for your Dutch Oven Sourdough Bread Recipe.
Essential ingredients for a perfect loaf
To achieve that delicious, crusty exterior and soft interior, you’ll need the following ingredients:
- Bread Flour: High protein content is essential for gluten development. This gives the bread its structure and chew.
- Water: Preferably room temperature, as it helps activate the yeast without stressing it out.
- Sourdough Starter: This is your natural leavening agent. Make sure it’s bubbly and active for the best rise.
- Salt: Adds flavor and also strengthens the gluten network. Don’t skip this ingredient!
Optional but recommended:
- Whole Wheat Flour: A mix with bread flour can enhance flavor and nutrition.
- Honey or Sugar: Just a touch can help kickstart fermentation and add subtle sweetness.
Ready to transform these ingredients into a baking masterpiece? Check out more tips on building your starter here and make sure to keep your workspace tidy for the best results!
Step-by-Step Preparation of Dutch Oven Sourdough Bread
Start early for a timeless tradition
If you’re looking to create something that transcends the ordinary, make sure to start your day early. Sourdough bread is not just a recipe; it’s a timeless tradition that dates back thousands of years. Each step in the process is a small celebration of patience and craft. So, set your alarm, take a deep breath, and let the adventure begin!
Mix the ingredients for a dough ball
Now that you’re awake and ready, it’s time to gather your ingredients. You’ll need:
- 500g all-purpose or bread flour
- 350g water (room temperature)
- 100g sourdough starter (active and bubbly)
- 10g salt
In a large mixing bowl, combine your flour with water, letting it absorb entirely. Then add the sourdough starter, mixing until it all comes together into a sticky dough ball. This step is straightforward but crucial — ensuring everything is well incorporated is the foundation of a good loaf.
The magic of kneading: Create your dough
Once you have your dough ball, it’s time for the next step: kneading. Transfer your dough onto a lightly floured surface. If kneading feels daunting, remember: it’s all about developing gluten and structure. Knead for about 10 minutes, using your palms to push and fold the dough back on itself. As you knead, you’ll notice that the dough becomes less sticky and more elastic.
Stretch and fold technique: First rise
After kneading, place your dough in a lightly oiled bowl and cover it with a damp cloth. During the first rise, you’ll want to incorporate the stretch and fold technique every 30 minutes for the first two hours. This involves gently stretching the dough from the edges and folding it over to the center. Do this four times, and feel free to check out this insightful article on sourdough techniques for more details!
Repeat the stretching and folding: Building strength
After the first rise, allow the dough to rest in a warm spot. During this time, keep repeating the stretch and fold process a couple more times over the next few hours. This method not only builds strength, but it also helps to aerate the dough, creating those beautiful holes we all love in a good loaf.
Pre-shaping your dough: Ready for its final form
Once your dough has risen beautifully, it’s time to pre-shape it. Lightly flour your work surface and turn your dough out. Gently shape it into a round ball and let it rest for about 30 minutes under a dish towel. This rest period helps relax the gluten, making your final shaping easier.
Final shaping before proofing
After the dough has rested, it’s time to shape it into its final form. You can choose a round loaf or an oval one based on your Dutch oven. Focus on tightening the surface of the dough, creating tension that will support your loaf during baking.
Overnight proofing: Patience is key
This is the moment to embrace patience. Place your shaped dough into a proofing basket or bowl lined with a floured cloth. Cover it and let it proof overnight in the fridge (about 12-14 hours). This slow fermentation will imbue your sourdough with greater flavors and improve its texture.
Preheat your Dutch oven for baking magic
On baking day, preheat your oven to 450 °F and place your Dutch oven inside during the preheat. This ensures that your loaf will get that signature crust when you drop it in. Keep in mind that a well-heated Dutch oven acts as a steamy environment, mirroring a professional bread oven.
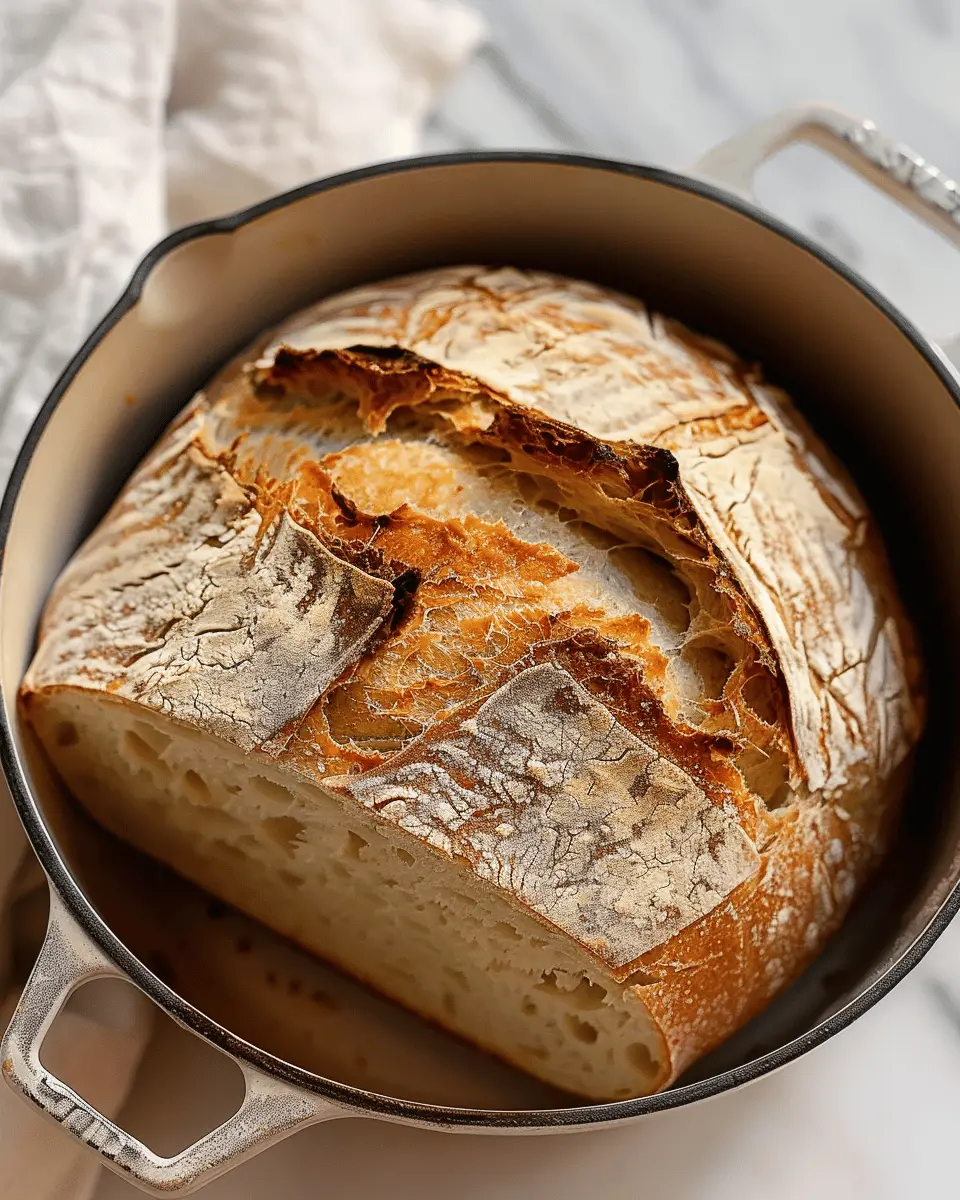
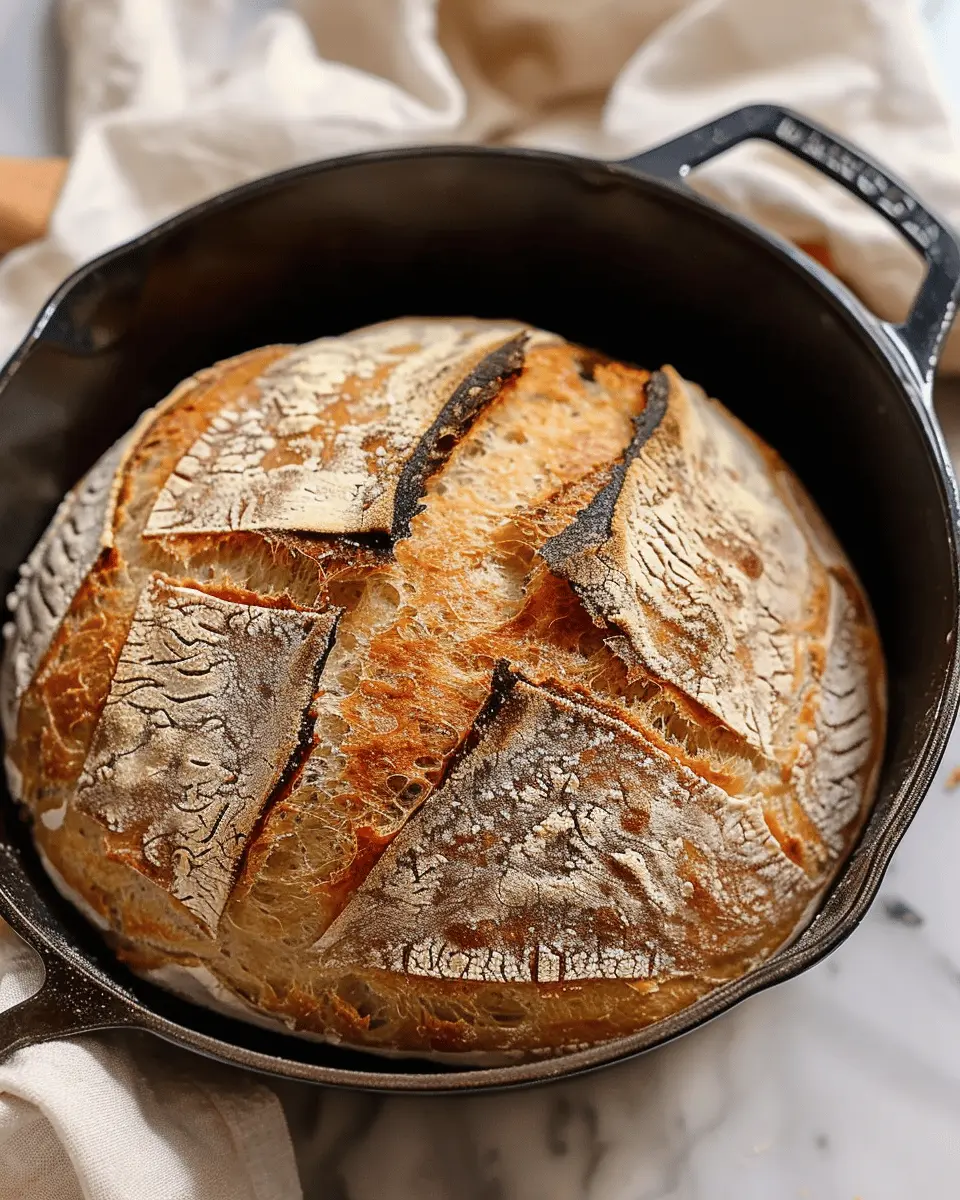
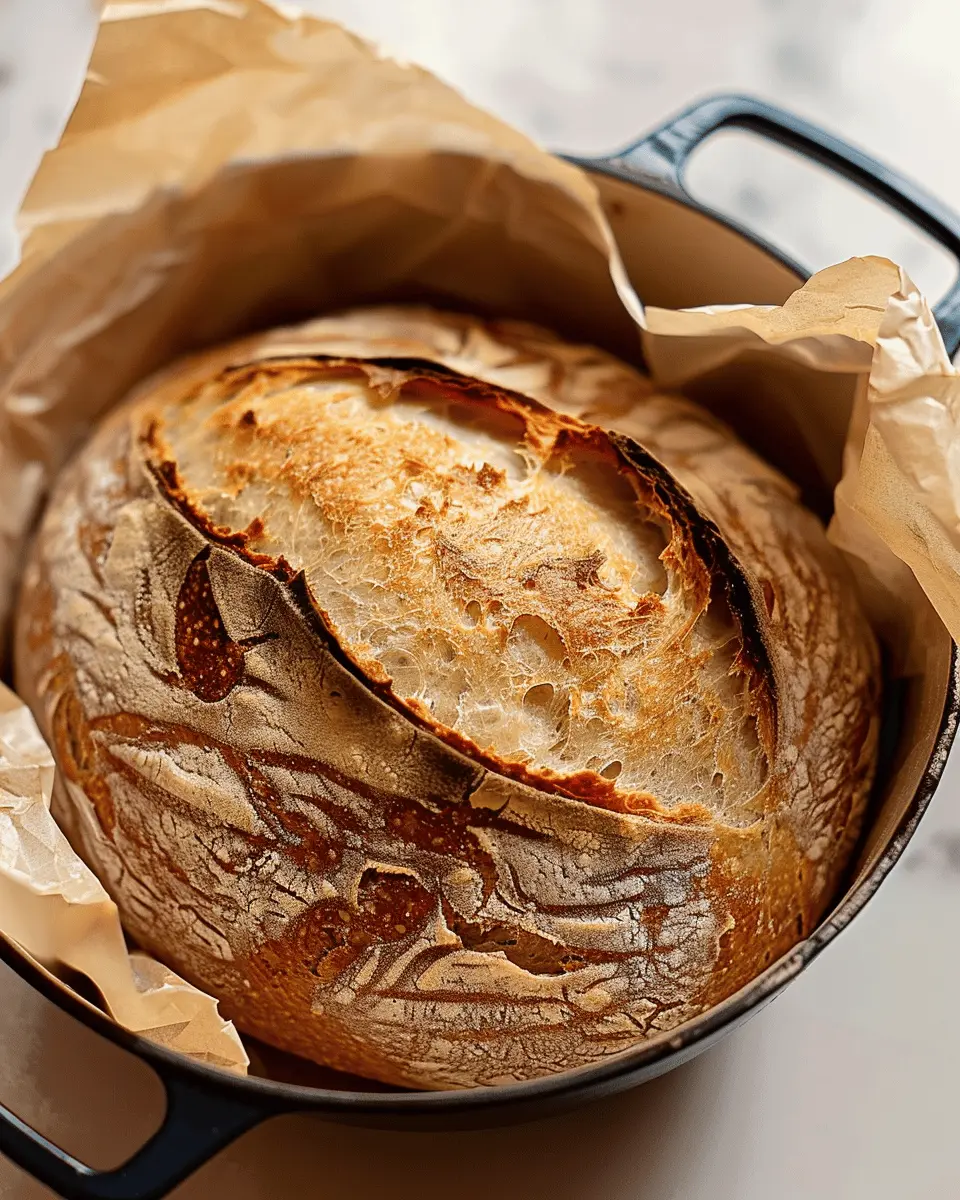
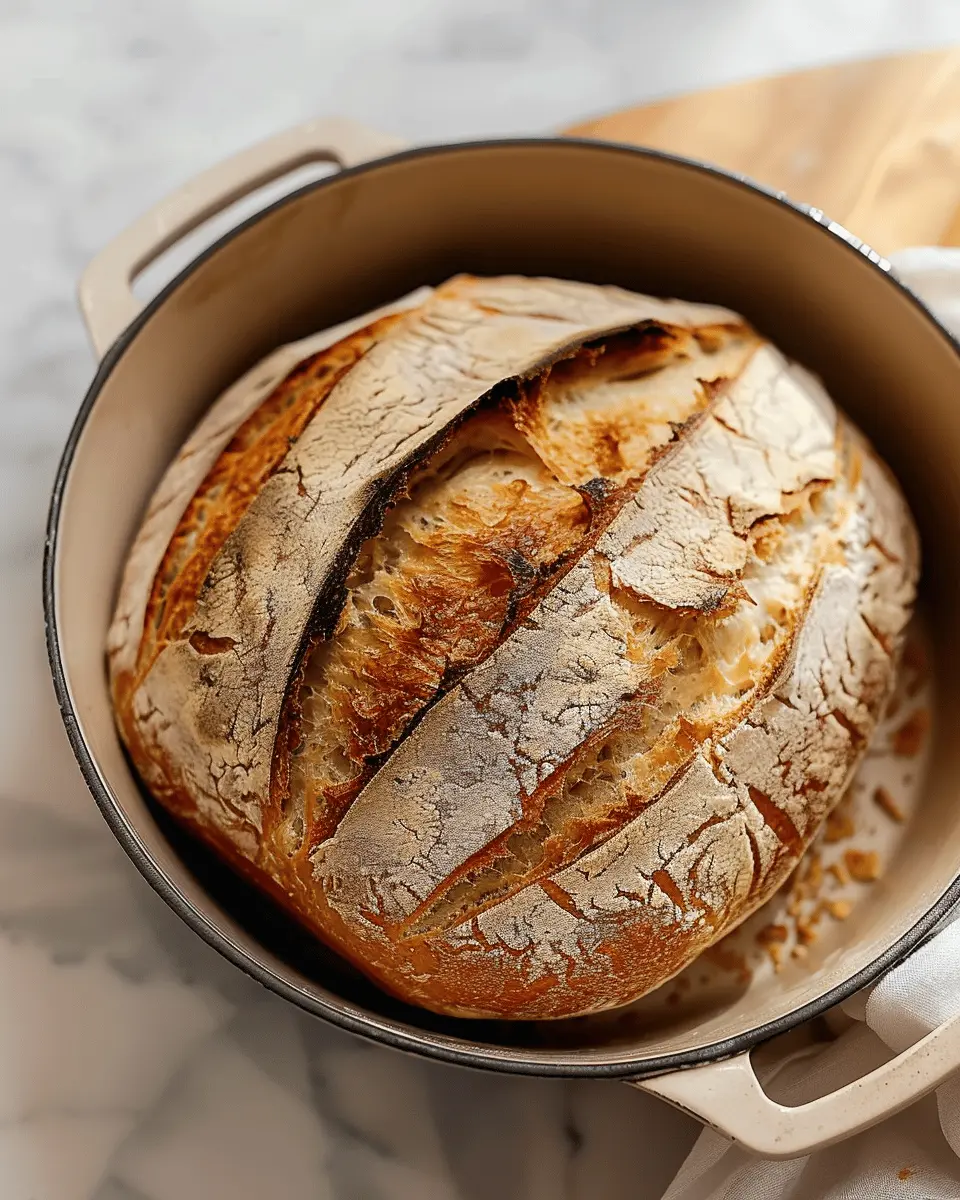
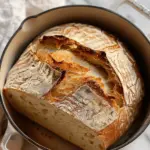
Scoring and baking your loaf to perfection
Once your oven and Dutch oven are preheated, it’s time for the final touches! Gently flip your dough onto parchment paper, then score the top with a sharp razor blade or knife — this allows the loaf to expand and breathe during baking. Carefully lower your dough into the hot Dutch oven, cover it, and let the magic happen for about 30 minutes. Remove the lid for the last 15 minutes, and watch your loaf transform into golden-brown perfection!
With these steps, you’re not just baking bread; you’re engaging in a wonderful experience. Savor each moment, and enjoy the delicious rewards of your labor with a slice or two of freshly baked Dutch Oven Sourdough Bread. Happy baking!
Variations on Dutch Oven Sourdough Bread
Adding herbs and spices for a flavor twist
A simple way to elevate your Dutch Oven Sourdough Bread Recipe is by infusing it with delicious herbs and spices. Think about classic pairings—rosemary and garlic, or perhaps thyme and sun-dried tomatoes. Dried herbs are your best friend here; add them directly to your dough during the mixing stage. You could even experiment with unconventional spices like smoked paprika or cumin for a unique twist.
Don’t forget to perform a taste test before committing. A small portion of dough can be flavored and baked to see if the blend matches your palate. Browning the crust will enhance the aroma and deepen the flavor, making your kitchen smell divine.
Incorporating seeds and nuts for texture
If you crave a heartier loaf, consider folding in some seeds and nuts. Sunflower seeds, pumpkin seeds, or even chopped walnuts can substantially change the texture and flavor profile of your Dutch Oven Sourdough Bread Recipe. These ingredients not only provide a satisfying crunch but also boost the nutrition factor.
Try soaking your seeds beforehand to enhance their flavors, or toast them lightly to bring out their nuttiness. When mixing them in, be mindful of how much you use; around 1 cup for a standard batch is a good rule of thumb. Combining these ingredients not only diversifies your bread but also caters to varied dietary preferences, promoting a more inclusive baking experience.
Embrace your creativity and find what works best for you—each loaf can tell a different story! For inspiration, check out sites like King Arthur Baking or Breadtopia for diverse recipes and ideas to enhance your baking venture.
Cooking Tips and Notes for Dutch Oven Sourdough Bread
Baking sourdough bread in a Dutch oven can be incredibly rewarding, but it does come with its challenges. Here are some handy tips to help ensure your Dutch Oven Sourdough Bread Recipe turns out beautifully every time.
Troubleshooting Common Baking Issues
-
Crust Too Thick: If you find your crust is overly hard, try lowering the baking temperature a bit or reducing the time the lid is on. This will keep the moisture in early on while allowing a crisp outer layer later.
-
Dense Bread: A dense loaf often indicates under-proofing. Make sure your dough rises sufficiently, ideally doubling in size before baking. Using a kitchen timer can help you stay on track!
-
Sticking to the Pot: If your bread sticks, consider using parchment paper. It makes for easy transfer and cleanup — plus, it helps achieve that nice round shape you’re after.
For even more insight on handling baking hiccups, check out the King Arthur Baking Company. Their advice on bread issues is top-notch!
Remember, practice makes perfect. So don’t be disheartened; every loaf is a lesson!
Serving Suggestions for Dutch Oven Sourdough Bread
Perfect Pairings: Spreads and Toppings
When it comes to enjoying your Dutch Oven Sourdough Bread Recipe, the options for spreads and toppings are nearly endless! The deep flavor profile of sourdough complements various toppings, making it a versatile choice for any meal.
Spread the Love:
- Cream Cheese: A classic choice, cream cheese pairs beautifully with fresh herbs or a drizzle of honey.
- Avocado: Mash it up with a sprinkle of salt, pepper, and a squeeze of lime for a nutritious and tasty topping.
- Hummus: Try different flavors like roasted garlic or red pepper for a creamy, protein-packed alternative.
Layer on Some Protein:
- Turkey Bacon: Crispy slices can add a salty crunch to your sandwich creations.
- Chicken Ham: This leaner option makes for a lighter yet savory addition.
Serve your Dutch Oven Sourdough Bread with a side of fresh salad or roasted vegetables for a complete meal. Looking for more inspiration? Check out resources like BBC Good Food or Serious Eats for additional ideas!
Time Breakdown for Dutch Oven Sourdough Bread
Preparation time: A manageable commitment
Crafting your Dutch Oven Sourdough Bread starts with about 20 minutes of hands-on time. You’ll be mixing, folding, and shaping, which feels anything but tedious when you consider the delightful aroma that will fill your kitchen later! This short initial investment allows the dough to ferment naturally, enhancing the flavor and texture.
Baking time: Making the most of your oven
Once your dough has risen to perfection, the baking process takes about 30 to 40 minutes. Preheating your Dutch oven is crucial here, as it creates that crispy crust we all adore. Plus, you’ll relish those beautiful oven springs as your bread bakes!
Total time: Enjoying the process
In total, including rising and resting times, you’re looking at around 4 to 8 hours—most of which is passive. This is the beauty of sourdough; it fits into your day without demanding your undivided attention. You can check out more on bread making tips from sources like King Arthur Baking to enhance your skills! Remember, the journey is just as rewarding as the final loaf.
Nutritional Facts for Dutch Oven Sourdough Bread
Calories and Macros: What to Expect
When diving into the world of Dutch Oven Sourdough Bread, knowing the nutritional profile can enhance your baking experience. Typically, one slice (about 28g) of sourdough contains:
- Calories: 70-80
- Carbohydrates: 15g
- Protein: 2-3g
- Fat: 0-1g
- Fiber: 1g
These numbers can vary based on ingredients, so feel free to personalize your recipe. Curious to learn more? Check resources like the USDA website for comprehensive nutritional facts.
Benefits of Choosing Sourdough Over Store-Bought
Why choose your homemade Dutch Oven Sourdough Bread over its store-bought counterparts? For starters, sourdough fermentation breaks down harmful phytates, enhancing mineral absorption. Additionally, the natural probiotics found in sourdough improve gut health. According to a study published in the Journal of Food Science, sourdough also has a lower glycemic index, supporting better blood sugar management compared to regular bread options.
Imagine having a fresh-baked loaf that not only tastes amazing but also nourishes your body in ways commercial breads often do not!
FAQs about Dutch Oven Sourdough Bread
Baking sourdough bread can be a delightful journey, but you might have a few questions along the way. Here are some common queries about making an incredible Dutch Oven Sourdough Bread Recipe to help you achieve that perfect loaf!
How do I know when my sourdough is ready?
One of the most important aspects of sourdough baking is timing. To check if your dough is ready to go, look for the following signs:
- Doubling in Size: Your dough should approximately double in size during the proofing stage.
- Poking Test: Gently poke the dough with a finger. If it springs back slowly, it’s ready. If it deflates quickly, it needs more time.
- Bubbles on the Surface: A bubbly, slightly domed surface indicates fermentation is happening.
For visual guidance, check out this resource on sourdough fermentation.
Can I use whole grain flour?
Absolutely! Whole grain flour can provide a richer flavor and more nutrition. Just keep in mind that it may absorb more water than white flour, so you might need to adjust your hydration level slightly. Mixing whole grain with all-purpose flour can yield a nice balance, resulting in a hearty loaf without compromising lightness.
What is the best way to store my sourdough?
To keep your Dutch Oven Sourdough Bread fresh, consider these storage options:
- Room Temperature: Store your bread in a bread bag or a cotton towel for a couple of days.
- Freezing: For longer storage, slice your bread and wrap it tightly in plastic before placing it in an airtight container or freezer bag. It can last up to three months.
- Reheating: To refresh your loaf, just pop it in the oven at 350°F for about 10-15 minutes.
No matter how you choose to store it, your sourdough will always bring warmth to your kitchen!
Conclusion on Dutch Oven Sourdough Bread
Embracing the Art of Homemade Sourdough Bread
Baking your own Dutch Oven Sourdough Bread is more than just about crafting a beautiful loaf; it’s a delightful journey that nourishes both the body and the soul. There’s a unique satisfaction in transforming simple ingredients—flour, water, and salt—into a warm, crusty masterpiece that fills your kitchen with an inviting aroma.
Have you ever wondered why baking bread is so therapeutic? It’s about the rhythm of kneading, the anticipation as it rises, and the joy of sharing. Whether you’re a novice or a seasoned baker, this Dutch Oven Sourdough Bread Recipe offers a simple yet rewarding experience that will impress family and friends. For additional tips on enhancing your baking skills, check out resources from reputable culinary sites like King Arthur Baking Company and The Bread Lab.
So, roll up your sleeves, embrace the process, and enjoy the fruits of your labor. Happy baking!
PrintDutch Oven Sourdough Bread Recipe: The Best Master Recipe at Home
This Dutch Oven Sourdough Bread Recipe is a master recipe that will help you create delicious and crusty bread at home.
- Prep Time: 15 minutes
- Cook Time: 45 minutes
- Total Time: 12-18 hours + 45 minutes
- Yield: 1 loaf 1x
- Category: Bread
- Method: baking
- Cuisine: American
- Diet: vegetarian
Ingredients
- 3 cups all-purpose flour
- 1 teaspoon salt
- 1/4 teaspoon active dry yeast
- 1 1/2 cups water
Instructions
- In a large mixing bowl, combine flour, salt, and yeast.
- Add water and mix until a shaggy dough forms.
- Cover the bowl with plastic wrap and let it rest for 12-18 hours at room temperature.
- After resting, turn the dough out onto a floured surface and shape it into a ball.
- Place the dough on a floured piece of parchment paper and let it rise for another 1-2 hours.
- Preheat your Dutch oven in the oven at 450°F (230°C).
- Carefully transfer the dough into the hot Dutch oven, cover it, and bake for 30 minutes.
- Remove the lid and bake for an additional 15-20 minutes until golden brown.
- Let it cool on a wire rack before slicing.
Notes
- Let the dough rise longer for a more sour flavor.
- Experiment with different types of flour for variety.
Nutrition
- Serving Size: 1 slice
- Calories: 150
- Sugar: 0.4 grams
- Sodium: 300 milligrams
- Fat: 0.5 grams
- Saturated Fat: 0 grams
- Unsaturated Fat: 0.2 grams
- Trans Fat: 0 grams
- Carbohydrates: 31 grams
- Fiber: 1 gram
- Protein: 5 grams
- Cholesterol: 0 milligrams
Keywords: Dutch Oven Sourdough Bread, Sourdough Recipe, Bread Recipe