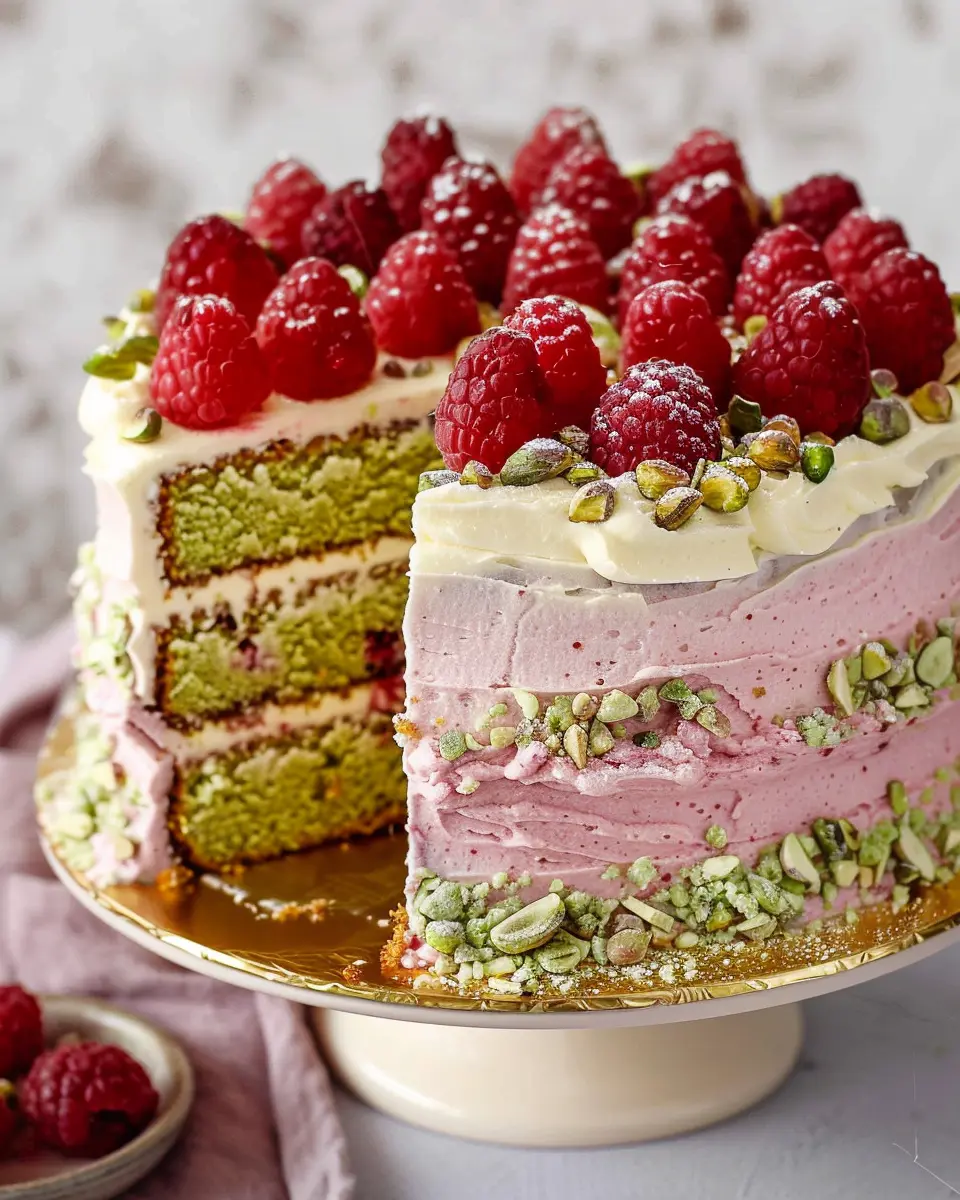
Why Layer Cakes Are a Favorite for Special Occasions
There’s something undeniably celebratory about a layer cake. The towering tiers, the vibrant frosting, and the delightful fillings create a stunning centerpiece that doesn’t just taste good but also looks magnificent. Layer cakes are often the star of birthday parties, weddings, and other special gatherings, generating more “oohs” and “aahs” than any other dessert! It’s not just about indulgence; it’s a way to connect with friends and family over a shared experience.
Imagine unwrapping a beautifully decorated layer cake with loved ones. It instantly elevates any occasion. Whether you’re celebrating a major milestone or simply hosting a weekend dinner, a layer cake can bring an air of festivity. According to a study by the American Baker’s Association, cakes are synonymous with happiness, making them the perfect choice for creating memorable moments. Plus, with the endless variety of flavors and styles—from classic vanilla to decadent chocolate ganache—there’s truly something for everyone.
Steps on How to Assemble a Layer Cake
So, you’ve baked and cooled your cakes; now it’s time to put those delicious layers together! Here’s how to assemble a layer cake in a few easy steps:
-
Prep Your Workspace: Make sure your kitchen counter is clean and clear. Have all your tools ready: a cake stand, an offset spatula, and a turntable if you have one.
-
Level Your Cakes: Use a serrated knife to trim off any domed tops of your cakes, ensuring they’re flat. This will help your cake stack evenly.
-
Add the First Layer: Place one layer on your cake stand. Spread a generous amount of your favorite filling—whether it’s buttercream, fruit preserves, or even a cream cheese mix.
-
Repeat the Process: Gently press down the second layer and repeat until all layers are stacked. Don’t forget to spread a thin layer of frosting on the top and sides to catch any crumbs!
-
Chill and Frost: Refrigerate your cake for about 30 minutes to set the filling. Then, apply a thicker layer of frosting and decorate as you wish.
For more inspiration and tips, consider checking out sites like Serious Eats or Epicurious. They offer incredible recipes and decorating ideas to boost your cake-building skills.
Now that you know how to assemble a layer cake, the only thing left is to slice, serve, and savor every bite of your creation!

Ingredients for a Layer Cake
Essential Ingredients for a Basic Layer Cake
When you’re dreaming of the perfect layer cake, starting with the right ingredients is key. Here’s a simple list of essentials to get you going:
- Flour: All-purpose flour works beautifully as the base for your cake.
- Sugar: Granulated sugar not only sweetens but also helps in achieving that lovely texture.
- Butter: Use unsalted butter for a rich flavor; it’s crucial for that moist crumb.
- Eggs: Fresh eggs bring richness and help bind everything together.
- Baking Powder: This leavening agent is essential for a fluffy rise.
- Milk: Whole milk adds moisture and balance; if you’re looking for an alternative, almond milk is a tasty option.
- Vanilla Extract: A splash of pure vanilla elevates the overall flavor.
For tips on how to assemble a layer cake, consider checking out Baker’s Journal for expert insights!
Must-Have Tools for Assembling Your Cake
Equipping yourself with the right tools can make all the difference in creating a beautiful layer cake:
- Cake Pans: At least two 9-inch round pans will help create those gorgeous layers.
- Offset Spatula: This is your best friend for smoothing frosting between layers and on top.
- Cake Leveler: If you want to ensure even layers, a cake leveler is invaluable.
- Turntable: For a professional finish, a cake turntable allows for effortless decorating.
- Offset or Flexible Spoons: Essential for mixing batter and spreading frosting evenly.
By gathering these ingredients and tools, you’re setting yourself up for success in mastering how to assemble a layer cake!
Step-by-Step Preparation for Layer Cakes
Creating a stunning layer cake is truly a labor of love, and each step holds significance in crafting that delectable masterpiece. Let’s walk through the essential stages of preparation so that when you’re ready to assemble your layer cake, everything goes smoothly. Trust me, with a little patience and practice, you’ll be impressing your friends and family in no time!
Leveling the Cake Layers
The first step to creating a beautiful layer cake is ensuring that your cake layers are leveled. Uneven layers can cause a lopsided cake, and we don’t want that!
-
Cool and Chill: Allow your cakes to cool completely in their pans. It’s often best to chill them in the refrigerator for about 30 minutes. This makes them easier to handle and slice.
-
Using a Serrated Knife: Once chilled, use a serrated knife to gently trim the domed top of each cake layer. Hold the knife parallel to the counter, cutting slowly for an even finish. Alternatively, a cake leveler can be a helpful tool for achieving precise cuts.
-
Tip: As you cut, rotate the cake to maintain a consistent height. This will help in creating a polished presentation when you start stacking.
Stacking the Layers Perfectly
Now comes the fun part—stacking the layers. Achieving a stable stack is vital for your cake’s overall structure and aesthetics.
-
Choose a Base: A sturdy cake board or plate is essential. This base will support your cake and make transportation easier.
-
Centering Each Layer: Start with your first layer on the base and ensure it’s centered. For added stability, spread a dollop of frosting in the center before placing the next layer.
-
Alignment is Key: As you add each layer, make sure they’re aligned perfectly. A slight tilt can throw off your frosting or decoration later.
For more detailed stacking techniques, you might want to check out tutorials from cake decorating experts like the Wilton Method, which offers great insights on creating multi-layer cakes.
Applying the Crumb Coat
Next is the crumb coat, a thin layer of frosting that traps any loose crumbs so that they don’t spoil your final frosting layer. It’s an essential step in learning how to assemble a layer cake.
-
Frosting Preparation: Use a frosting that complements your cake flavor. A cream cheese or buttercream frosting works exceptionally well.
-
Apply a Thin Layer: With a spatula, smear a thin coat of frosting over the entire cake. Don’t worry about perfection; this is just the first layer to lock in the crumbs.
-
Chill the Cake: After applying the crumb coat, refrigerate it for about 20-30 minutes to set. This will ensure a smoother finish when you apply the final coat.
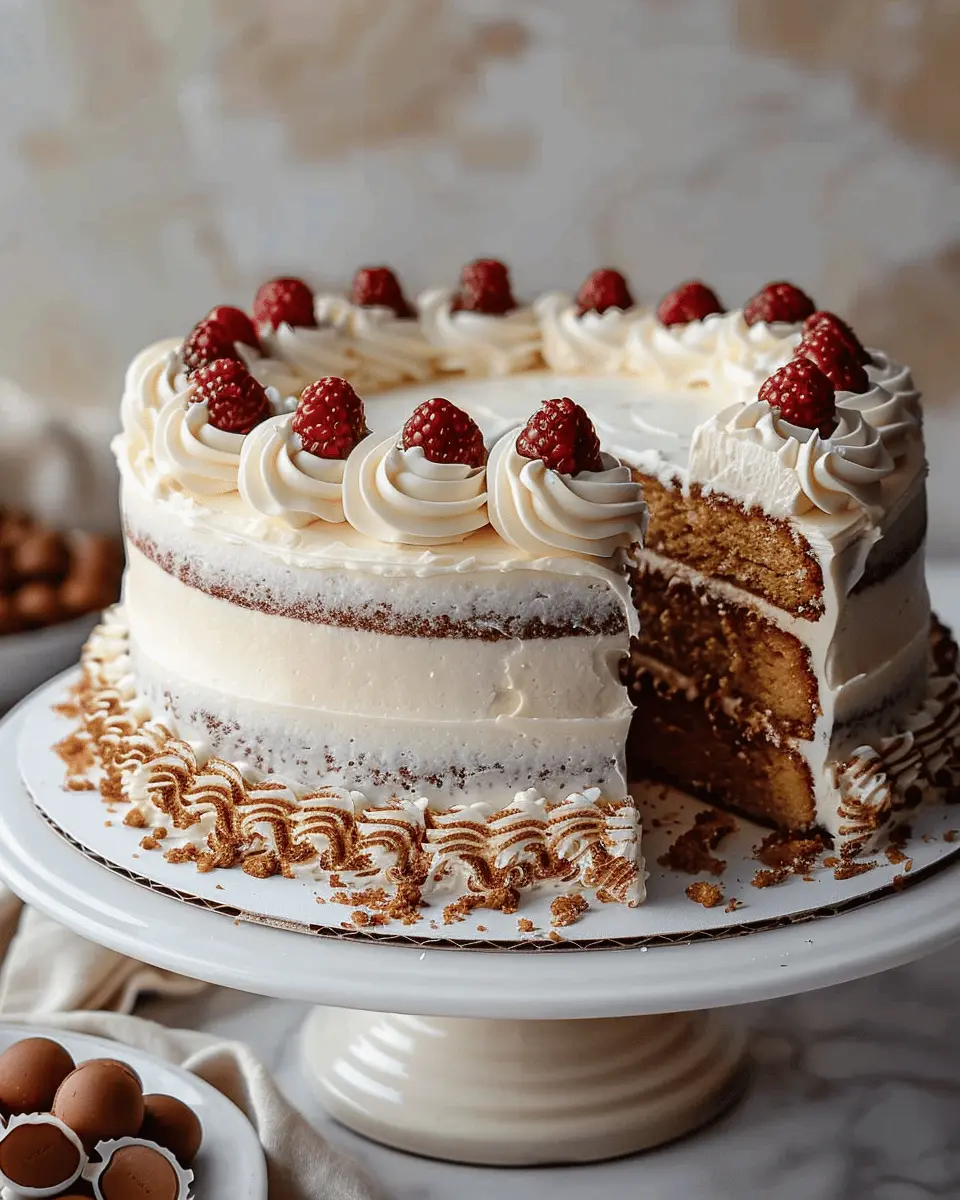
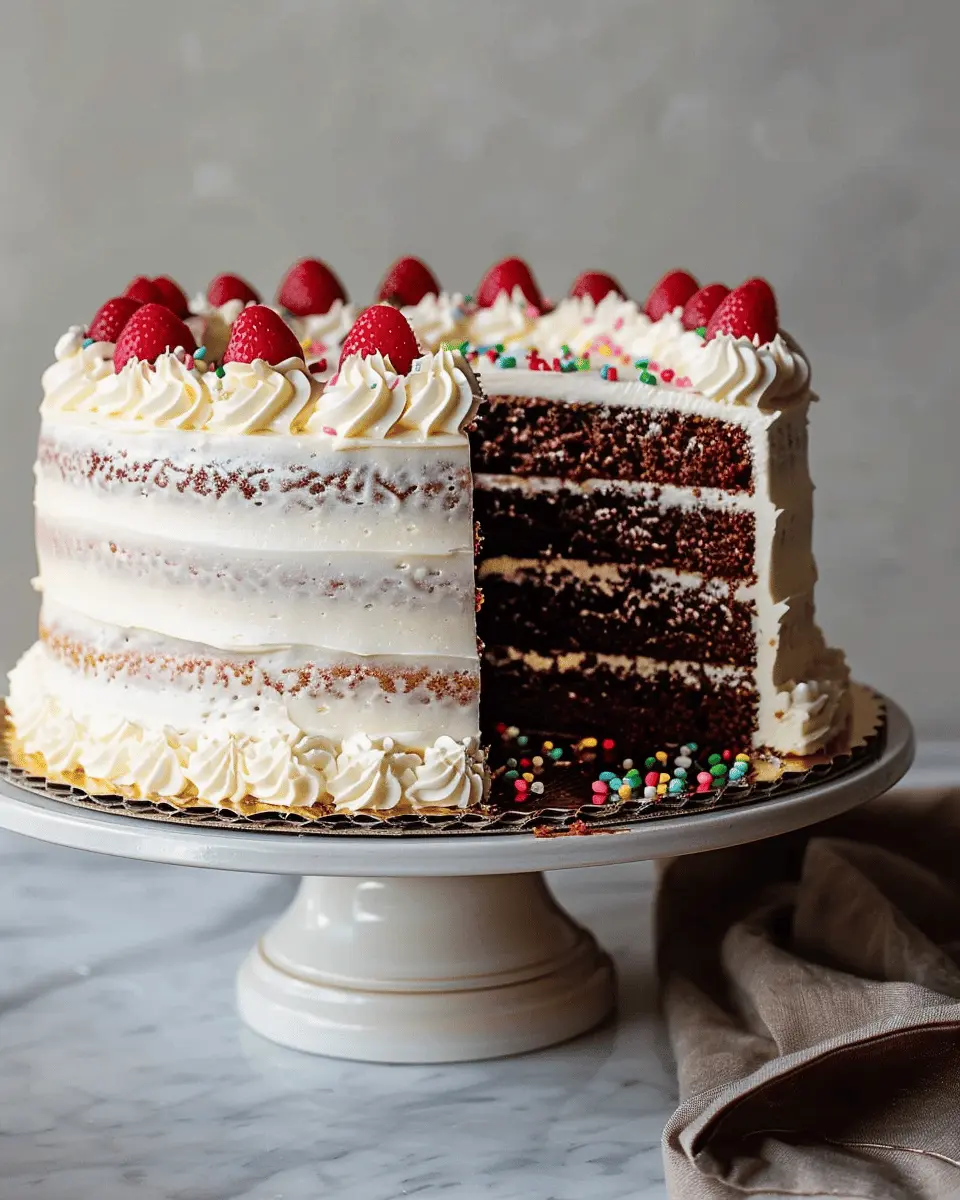
Decorating the Cake
Now for the creative part—decorating! This is where your personal style shines through.
-
Choose Your Frosting Technique: Whether you prefer smooth finishes or textured designs, the choice is yours. A bench scraper can help achieve that sleek finish.
-
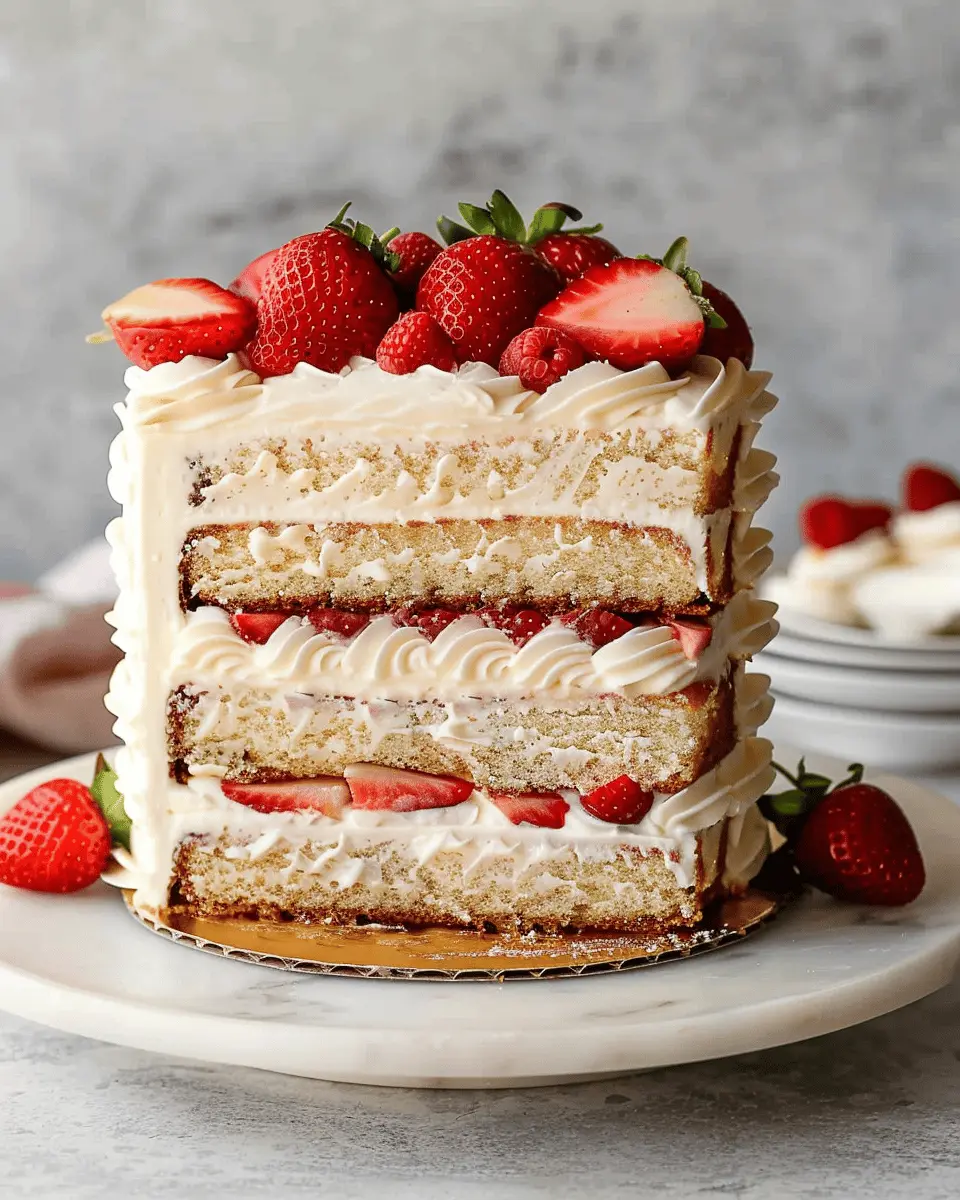
Add Fun Elements: Consider fresh fruits, chocolate shavings, or edible flowers to enhance the aesthetic appeal. They add flavor and make your cake pop visually!
-
Piping Skills: If you’re feeling adventurous, try piping designs with a pastry bag. Start with simple rosettes or swirls until you get comfortable.
If you’re looking for more decoration inspirations, Cake Wrecks can be a fun resource to see both successful and humorous attempts at cake artistry.
Final Touches Before Serving
Your cake is nearly ready to impress! Before you present this wonderful creation, take a moment for some finishing touches.
-
Smoothing Any Imperfections: Use an offset spatula dipped in warm water to smooth over any frosting imperfections.
-
Chill Again: Placing the cake back in the fridge for about 10-15 minutes can help set the decorations.
-
Presentation: Finally, consider how you want to slice and serve your cake. Using a sharp knife will give you clean cuts for each guest, ensuring that everyone gets a beautiful piece.
In conclusion, with these steps in mind, you’re now equipped with the skills needed for assembling a gorgeous layer cake that impresses at any event. Enjoy the process, be patient, and don’t be afraid to let your personality come through in your design!
Variations of Layer Cakes
Creating a unique layer cake can be a delightful adventure! There are endless ways to play with flavors and textures to impress your guests and satisfy your own sweet tooth.
Creative flavor combinations for your layer cake
When it comes to flavor pairings in layer cakes, the possibilities are truly exciting. Why not try zesty lemon and blueberry, which adds a refreshing twist? Or, for chocolate lovers, a layer of dark chocolate cake paired with a mocha cream filling is bliss. If you’re feeling adventurous, consider layering spice cake with apple butter—each slice will be a comforting bite reminiscent of autumn.
To guide your choices, consider combining flavors that contrast and complement each other. The rich flavor of vanilla bean can be matched with a citrusy lime curd for a vibrant surprise. If you’re uncertain about pairing flavors, resources like Serious Eats can provide you with incredible ideas and inspiration.
Unique frosting ideas to try
The frosting is where creativity truly shines, and there’s so much to explore beyond a classic buttercream! Have you ever considered a whipped cream cheese frosting? It’s light and tangy, perfect for fruit layered cakes. For a fun twist, a cookies and cream frosting infused with crushed cookies will add a lovely crunch.
Another idea is incorporating fresh herbs. Imagine a basil-infused cream cheese frosting over a berry layer cake; that herbaceous note could elevate your dessert to gourmet level! For more unique frosting ideas, check out expert tips from Bon Appétit.
So, as you dive into your adventure on how to assemble a layer cake, remember to play with your flavors and enjoy the process! Happy baking!
Baking Tips and Notes for Layer Cakes
Common mistakes to avoid
When learning how to assemble a layer cake, it’s easy to stumble over a few common pitfalls. One of the most frequent mistakes is using cold cake layers; they can crumble when you try to stack them. It’s best to wrap your cakes in plastic wrap and refrigerate them for a couple of hours before assembling. This makes them firmer and easier to handle.
Additionally, be cautious with your frosting application. Too much pressure can squish the layers, leading to a lopsided cake. A palette knife works wonders for even spreads, ensuring a neat finish.
How to achieve the perfect texture
The perfect cake texture starts with the right ingredients. Using room-temperature eggs and butter helps create a light, airy batter. For a moist layer, consider incorporating buttermilk or sour cream; they add richness and tenderness.
Lastly, remember that layering is an art. Invest in a good cake leveler for precise cutting, ensuring each layer is even for that stunning, professional look. For more insights, check out The Science of Baking.
Serving Suggestions for Layer Cakes
Pairing Your Layer Cake with Beverages
When you’ve mastered how to assemble a layer cake, the next delightful step is figuring out how to enhance it with the perfect beverage pairings. Think about some refreshing options, like a nice herbal tea or sparkling lemonade. These light drinks can complement the sweetness of your cake without overwhelming your palate. For a cozy vibe, a rich cup of coffee or a creamy hot chocolate can elevate your dessert experience. If you’re looking for something a bit more sophisticated, non-alcoholic sparkling cider offers a festive option that resonates beautifully with layer cake flavors.
The Best Occasions for Serving Layer Cake
Layer cakes are the stars of many celebrations! Whether it’s a birthday, wedding, or a cozy gathering with friends, these cakes can steal the show. They also make excellent treats for brunch or afternoon tea, inviting everyone to indulge in a slice (or two!). Remember that a beautifully assembled layer cake can be a centerpiece for any event, igniting conversations and creating memorable moments.
For more inspiration, check out this guide on party planning essentials that offers tips on incorporating desserts. Happy baking!
Time Breakdown for Layer Cakes
Preparation time
To create your delicious layer cake, you’ll want to set aside about 30-45 minutes for preparation. This includes gathering your ingredients, prepping your pans, and mixing your cake batter. Remember, having everything ready before you start can make the process smoother and more enjoyable.
Assembly time
Now comes the fun part! Assembling the cake will likely take you around 30 minutes. This involves leveling the layers, icing, and stacking, so take your time to perfect each step. A great resource for icing techniques can be found in this helpful guide for bakers of all levels.
Total time
In total, you’re looking at roughly 1-1.5 hours from start to finish. This may vary based on your experience, but the end result—a stunning layer cake—will be worth every minute. If you’re curious about how to assemble a layer cake like a pro, consider setting aside a little extra time for practice or to explore new flavor combinations!
Nutritional Facts for Layer Cakes
Calories per slice
Layer cakes can be a delightful treat, but it’s good to know what you’re indulging in! On average, a slice of homemade layer cake contains around 300-450 calories. This can vary based on ingredients like frosting and fillings. If you’re keeping an eye on calorie intake, consider portion control and enjoy every bite without guilt!
Sugar content and alternatives
The sugar content in a standard slice can be quite high, often reaching 30 grams per slice. If you’re looking for ways to reduce sugar without sacrificing flavor, consider using natural sweeteners like honey or maple syrup. Alternatively, stevia or monk fruit sweeteners can be great low-calorie replacements. For more information on healthier baking substitutes, check out Healthline’s guide on sugar alternatives.
Learning how to assemble a layer cake with nutritious ingredients not only elevates your baking skills but also makes for a healthier dessert option. After all, balance is key!
FAQs about Layer Cakes
What if my cake layers are not level?
Uneven cake layers can be frustrating, but don’t worry! Many bakers face this issue. Here are a few tips to fix it:
- Trim the tops: Use a serrated knife to carefully slice off the rounded tops of your cake layers.
- Cake strips: Before baking, wrap damp cake strips around your pans to help the cake rise more evenly. They can make a big difference!
For a helpful guide on leveling cakes, check out this resource for expert tips.
How can I keep my layer cake fresh?
Keeping your layer cake fresh is key to deliciousness! Here’s how:
- Store properly: If you’re enjoying it within a couple of days, keep it in an airtight container at room temperature. Ground rules are simple—keep it cool and tightly covered.
- Avoid humidity: Excess moisture can lead to soggy layers. If you live in a humid climate, consider refrigerating your cake, but bring it back to room temperature before serving for the best experience.
Can I freeze my layer cake?
Absolutely! Freezing your layer cake can be a lifesaver. Here’s how to do it without sacrificing flavor or texture:
- Wrap well: Once cooled, wrap each layer in plastic wrap and then in foil. This double layer protection keeps your cake fresh.
- Thaw gently: When you’re ready to enjoy it, transfer the wrapped cake to the fridge overnight before letting it sit at room temperature.
This preparation ensures you can savor your homemade creation later. Now that you’re equipped with these tips on how to assemble a layer cake effectively, happy baking!
Conclusion on Assembling Layer Cakes
Embrace your creativity and enjoy the process!
As you learn how to assemble a layer cake, remember that it’s not just about the final outcome but the joy of creating something unique. Layer cakes are a canvas awaiting your personal touch, whether it’s flavors, fillings, or garnishes. Don’t stress over perfection; even the most seasoned bakers have their off days.
Here are a few tips to keep in mind:
- Experiment with different frosting techniques until you find your style.
- Incorporate seasonal fruits or nuts for added texture and flavor.
- Share your masterpiece with friends or family—nothing beats the joy of enjoying cake together.
Check out this article on cake decorating for additional inspiration!
PrintHow to Assemble a Layer Cake: Easy Steps for Indulgent Perfection

Learn how to perfectly assemble a layer cake with these easy steps. Impress your guests with a beautiful and delicious dessert!
- Prep Time: 30 minutes
- Cook Time: 30 minutes
- Total Time: 1 hour
- Yield: 12 servings 1x
- Category: Dessert
- Method: Baking
- Cuisine: American
- Diet: Vegetarian
Ingredients
- 2 cups all-purpose flour
- 1 1/2 cups granulated sugar
- 1 cup unsalted butter, softened
- 4 large eggs
- 1 cup whole milk
- 2 tsp baking powder
- 1 tsp vanilla extract
- 1/2 tsp salt
Instructions
- Preheat the oven to 350°F (175°C) and prepare your cake pans.
- In a mixing bowl, cream together the butter and sugar until light and fluffy.
- Add the eggs one at a time, mixing well after each addition.
- Stir in the vanilla extract.
- In a separate bowl, combine the flour, baking powder, and salt.
- Gradually add the dry ingredients to the wet ingredients, alternating with the milk.
- Pour the batter evenly into the prepared cake pans and smooth the tops.
- Bake for 25-30 minutes or until a toothpick inserted in the center comes out clean.
- Let the cakes cool in the pans for 10 minutes, then transfer to wire racks to cool completely.
- Once cooled, assemble the layers with frosting in between and on top.
Notes
- To achieve even layers, level the tops of the cakes with a knife or cake leveler.
- Use a turntable for easier frosting application.
Nutrition
- Serving Size: 1 slice
- Calories: 350
- Sugar: 22g
- Sodium: 200mg
- Fat: 15g
- Saturated Fat: 9g
- Unsaturated Fat: 4g
- Trans Fat: 0g
- Carbohydrates: 45g
- Fiber: 1g
- Protein: 4g
- Cholesterol: 60mg
Keywords: How to Assemble a Layer Cake, layer cake, dessert, baking