Introduction to Chocolate Thumbprint Cookies
If you’re searching for a delightful treat that perfectly balances rich chocolate and a touch of nostalgia, look no further than Chocolate Thumbprint Cookies. These charming little cookies are not only visually appealing but also incredibly simple to make—making them a must-try for both baking enthusiasts and beginners alike.
What Are Chocolate Thumbprint Cookies and Why Are They a Must-Try?
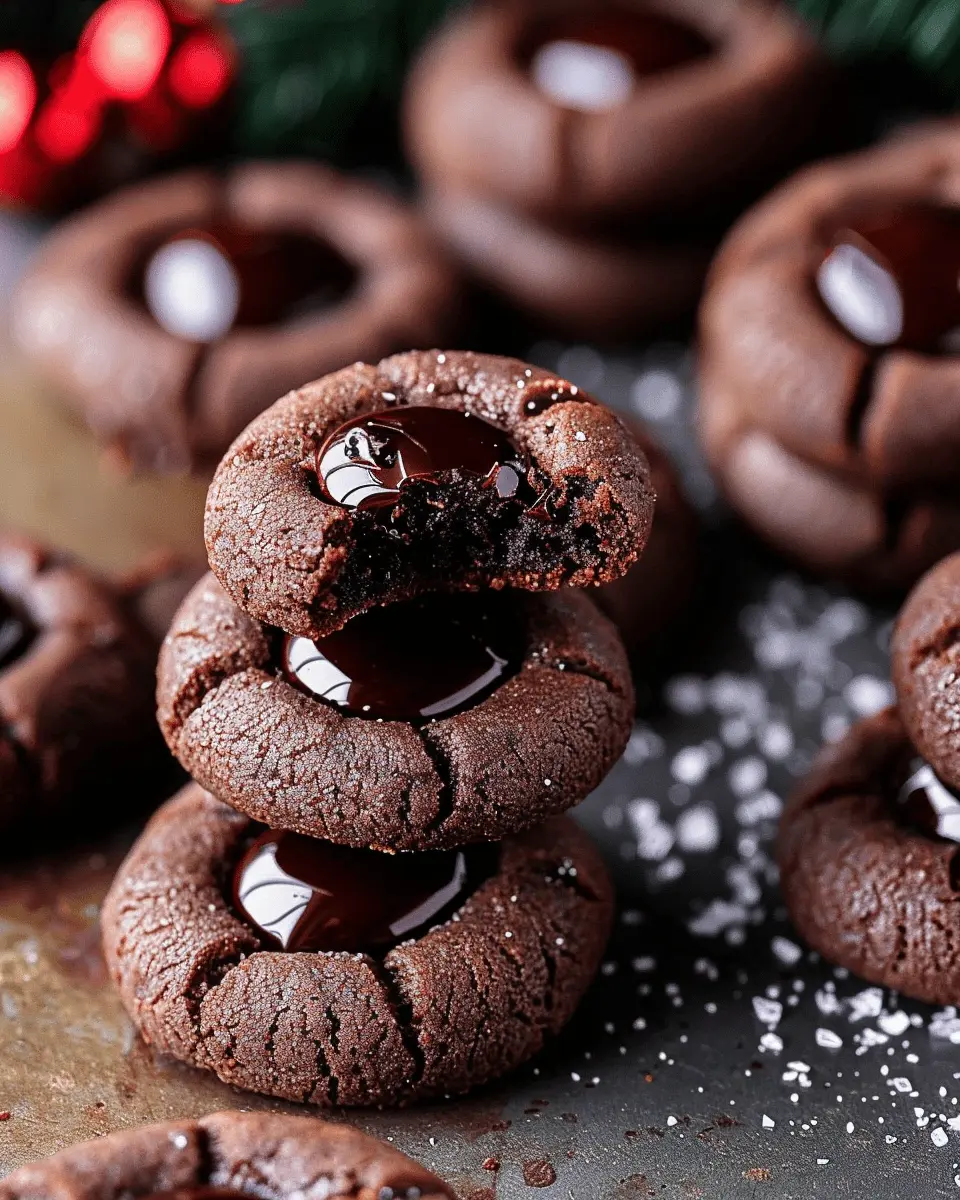
Chocolate Thumbprint Cookies are a unique twist on traditional thumbprint cookies, which typically feature a jam or jelly filling. Instead, these scrumptious creations use a velvety chocolate ganache or a dollop of your favorite chocolate spread nestled in the center. The combination of a soft, chewy cookie with creamy chocolate is truly irresistible.
Here’s why you should consider whipping up a batch:
- Ease of Preparation: These cookies are essentially foolproof. The dough comes together quickly, requiring minimal ingredients, and they bake in a flash.
- Versatile Filling Options: While chocolate ganache is the classic choice, feel free to experiment with other fillings! Nut butters, fruit preserves, or even marshmallow fluff can provide fun variations. Get inspired with ideas from resources like The Kitchn.
- Crowd-Pleasing Treat: Whether for a casual gathering or a fancy soirée, Chocolate Thumbprint Cookies are guaranteed to impress your friends and family. Their adorable shape and rich flavor make them perfect for any occasion.
Imagine serving these cookies at your next get-together and watching your guests’ faces light up with delight. They’re sure to become a staple in your baking repertoire.
So, why wait? The next time you find yourself with a sweet craving or needing a thoughtful gift for a friend, think of these Chocolate Thumbprint Cookies. They’re more than just cookies; they’re little bites of joy, each one begging to be shared.
Now that you’re excited about making these delicious cookies, let’s dive into the recipe that will have everyone asking for seconds!
Ingredients for Chocolate Thumbprint Cookies
Essential ingredients for the cookies
Baking up a batch of Chocolate Thumbprint Cookies is a delightful way to treat yourself and your friends. To achieve that perfect chewy texture with a hint of chocolatey goodness, make sure you have the following essential ingredients:
- Butter: 1 cup, softened to room temperature for easy mixing
- Granulated Sugar: 3/4 cup to sweeten the dough
- Brown Sugar: 1/4 cup for a rich flavor
- Eggs: 1 large, which helps bind the ingredients together
- Vanilla Extract: 1 teaspoon to enhance the cookie’s flavor
- All-Purpose Flour: 2 cups for the base of the cookies
- Cocoa Powder: 1/2 cup to give that deep chocolate taste
- Baking Powder: 1 teaspoon for that perfect rise
- Salt: 1/4 teaspoon to balance the sweetness
You can find more about the benefits of these ingredients on King Arthur Baking if you’re curious.
Ingredients for the chocolate ganache
No Chocolate Thumbprint Cookies would be complete without a rich, glossy ganache to fill those little indents! For the ganache, gather:
- Semi-sweet Chocolate: 1 cup, chopped, for a smooth and creamy texture
- Heavy Cream: 1/2 cup, which adds richness and thickness
Simply heat the cream until it’s hot but not boiling, then pour it over the chopped chocolate. Stir until melted and shiny—this step is pure magic!
So, are you ready to whip up a batch? You’ll be amazed at how quickly these cookies disappear!
Preparing Chocolate Thumbprint Cookies
Making Chocolate Thumbprint Cookies is a delightful way to express your inner baker, and it’s relatively straightforward! So, grab your apron, preheat that oven, and let’s get started on a sweet culinary adventure.
Gather and measure your ingredients
Before you plunge into the mixing bowl, it’s crucial to get organized. The first step in preparing your Chocolate Thumbprint Cookies is gathering all your ingredients. Here’s what you’ll need:
- 1 cup unsalted butter, softened
- 1 cup granulated sugar
- 1 egg
- 2 teaspoons vanilla extract
- 2 ½ cups all-purpose flour
- ½ cup unsweetened cocoa powder
- 1 teaspoon baking powder
- ¼ teaspoon salt
- A pinch of cinnamon (optional for warmth)
- For the filling: your choice of chocolate ganache or jam (raspberry or apricot work wonderfully)
Measuring your ingredients accurately is key to achieving those perfectly baked cookies. You can find more tips on baking essentials here.
Create the cookie dough
Now that you have everything ready, it’s time to whip up that delicious dough. In a large mixing bowl, beat together the softened butter and granulated sugar until the mixture is light and fluffy—around 2-3 minutes should do it. This incorporation of air is what makes your cookies soft and tender, so don’t rush!
Next, add the egg and vanilla extract, mixing until fully combined. In a separate bowl, whisk together the flour, cocoa powder, baking powder, salt, and optional cinnamon, before gradually adding this dry mix into your wet mixture. Combine until just mixed; overworking the dough can lead to tough cookies!
Shape the dough and make indents
Once your dough is ready, it’s time for some fun! Roll the dough into small balls, about the size of a tablespoon. Place them onto a parchment-lined baking sheet, spaced about 2 inches apart to allow for spreading during baking.
Now comes the star of the show—the thumbprint! Using your thumb (or the back of a teaspoon), gently press into the center of each dough ball to create a little well. Don’t worry if they crack slightly; that just means they’ll be extra delicious and rustic!
Chill the cookie dough
While it’s tempting to throw those cookies straight into the oven, chilling the dough is a critical step. Pop the baking sheet into the refrigerator for at least 30 minutes. This prevents the cookies from flattening too much during baking, ensuring they maintain that lovely shape.
Bake the cookies
Once chilled, preheat your oven to 350°F (175°C), and it’s time to bake! Slide your baking sheet into the oven and let them bake for about 10-12 minutes. You want them to be set around the edges but slightly soft in the center. The heavenly aroma will fill your kitchen, and you might even find it hard to resist sneaking a taste before they cool!
Prepare the chocolate ganache
While your cookies bake, let’s make a rich chocolate ganache. In a small saucepan over low heat, combine 1 cup of heavy cream and 8 ounces of semi-sweet chocolate (chopped or in chips). Stir until melted and smooth; this should only take a few minutes. Let it cool slightly to thicken up before using.
Assemble the cookies
Once the cookies are cool, it’s time to fill those delightful thumbprints! Spoon or pipe in your chocolate ganache into each well. For an extra pop of flavor, you can garnish with a sprinkle of sea salt or even a few raspberries for color and taste.
And there you have it—beautifully crafted Chocolate Thumbprint Cookies that are sure to impress anyone who takes a bite. They’re perfect for a gathering, or just because you deserve a treat! Enjoy baking, and most importantly, enjoy devouring these delicious cookies!
Variations on Chocolate Thumbprint Cookies
When it comes to Chocolate Thumbprint Cookies, the classic recipe is undeniably delicious, but why stop there? By experimenting with a few tasty variations, you can take this cookie to the next level—perfect for impressing your friends or simply indulging yourself!
Nutty Chocolate Thumbprint Cookies
If you’re a fan of nuts, try adding chopped hazelnuts, walnuts, or pecans into the cookie dough. Not only does this add crunch, but it also gives a delightful nutty flavor that complements the chocolate richness. Simply mix about half a cup of your chosen nuts into the dough before you shape your cookies. For an added touch, use a nut-based filling, such as hazelnut spread, in the thumbprint for a creamy, satisfying bite.
Seasonal Variations: Peppermint or Orange Zest
Celebrate the seasons with variations that reflect your mood. In the winter, a peppermint twist can be just what you need. Add a teaspoon of peppermint extract to your dough and top the cookies with crushed peppermint candies after baking. Not only will your kitchen smell amazing, but these cookies will also bring festive cheer!
During the vibrant spring or summer months, consider using orange zest instead. Adding a teaspoon of fresh orange zest to your dough will create a refreshing, zesty flavor that perfectly balances the richness of the chocolate. For an extra flourish, fill the thumbprint with orange marmalade or a citrus glaze.
By making these simple alterations, your Chocolate Thumbprint Cookies will shine with personality and seasonal charm. Which variation are you excited to try?
For more baking tips and delicious recipes, check out Food Network’s Baking Basics.
Baking Tips for Chocolate Thumbprint Cookies
Common pitfalls and how to avoid them
Baking Chocolate Thumbprint Cookies can be delightful, but there are a few common pitfalls to watch out for. One of the biggest mistakes is not letting the dough chill properly. Make sure to refrigerate the dough for at least 30 minutes to prevent the cookies from spreading too much in the oven. Additionally, when making the thumbprint, be gentle—press just enough to create an indentation without breaking the delicate cookie base.
Measuring ingredients accurately
Precision is key when baking, especially when it comes to Chocolate Thumbprint Cookies. Here are a couple of tips to ensure you get it right:
- Use a kitchen scale: This helps you measure ingredients like flour and sugar more accurately.
- Spoon and level method: For measuring flour, spoon it into your measuring cup and level it off with a knife for accuracy.
For more detailed measuring techniques, check out this guide on baking essentials. Happy baking!
Serving Suggestions for Chocolate Thumbprint Cookies
Pairing Cookies with Beverages
When enjoying your Chocolate Thumbprint Cookies, the right beverage can elevate the experience. Consider these delightful options:
- Coffee: A rich cup of coffee complements the chocolate beautifully, enhancing the melty joy of the cookies.
- Tea: Opt for a cozy chai or a refreshing mint tea. Both options bring out the buttery flavor of the cookies without overpowering them.
- Hot Chocolate: For the ultimate chocolate lover, pair your cookies with hot chocolate. This indulgent combination will warm your soul, especially on chilly evenings.
For more tips on choosing the perfect beverage, check out this article from Serious Eats.
Creative Ways to Present Cookies as Gifts
Looking to share your Chocolate Thumbprint Cookies? Packaging can make all the difference!
- Mason Jars: Layer cookies in a mason jar for a charming touch. Add a ribbon for an extra flair.
- Cookie Boxes: Use decorative boxes to present an assortment of cookies, making it perfect for any occasion.
- Handwritten Tags: Attach a heartfelt note or recipe tag for a personal touch. It shows you care and gives your gift an extra layer of warmth.
Each presentation can turn simple cookies into a treasured gift. So, whether you’re sharing them with friends or taking them to a party, a thoughtful presentation can truly make your Chocolate Thumbprint Cookies shine!
Time Breakdown for Chocolate Thumbprint Cookies
Preparation time
Getting ready to bake these delicious Chocolate Thumbprint Cookies? You’ll need about 20 minutes to gather your ingredients and whip up the dough. It’s a breeze!
Chilling time
To ensure that your cookies hold their shape and delightfully melt in your mouth, let the dough chill in the refrigerator for at least 30 minutes. This step is crucial — don’t skip it!
Baking time
Pop those cookie balls in the oven for 12 to 15 minutes. Just keep an eye on them until they’re set but not overbaked.
Total time
In total, you’re looking at approximately 1 hour from start to finish. This includes prep, chilling, and baking. Not too shabby for a sweet treat that will impress everyone!
For more tips on baking cookies, check out the Cookie Resource for expert advice. Happy baking!
Nutritional Information for Chocolate Thumbprint Cookies
Calories per cookie
When you’re indulging in these delightful Chocolate Thumbprint Cookies, you may want to know what you’re treating yourself to. Each cookie typically contains about 120-150 calories. That makes them a guilt-free option for a sweet snack after a long day.
Sugar and fat content
These cookies do pack a bit of sweetness, with around 7-10 grams of sugar per cookie. The fat content generally ranges from 6 to 8 grams, primarily due to the butter and chocolate, giving them that rich, melt-in-your-mouth quality.
For those keeping an eye on their sugar intake, consider using a sugar substitute or experimenting with darker chocolate for a healthier twist. Remember, enjoying a cookie here and there is all about balance! Curious about other nutritious dessert alternatives? Check out this guide on healthy baking options.
So, next time you savor a Chocolate Thumbprint Cookie, you can do so with a bit more insight into what’s going into your body. Enjoy responsibly!
FAQs about Chocolate Thumbprint Cookies
Can I use dark chocolate instead of semi-sweet?
Absolutely! Using dark chocolate in your Chocolate Thumbprint Cookies can add a richer, more intense flavor. Just keep in mind that dark chocolate has a higher cocoa content, which can make your cookies a bit less sweet. If you enjoy that dark, decadent taste, go for it! You might even consider reducing the sugar in your recipe slightly to balance the flavors. For some great insights on chocolate varieties, check out resources like Fine Cooking.
How do I store leftover cookies?
To keep your Chocolate Thumbprint Cookies fresh and delightful, store them in an airtight container at room temperature. They should stay delicious for about a week. If you’re worried about them becoming too soft, you can place parchment paper between layers to help them keep their shape. For longer storage, consider putting them in the refrigerator, although this can alter their texture slightly.
Can I freeze cookie dough?
Yes, you can freeze the cookie dough! It’s one of the best ways to ensure you have a batch of Chocolate Thumbprint Cookies ready to bake at a moment’s notice. Just scoop the dough into balls and place them on a baking sheet lined with parchment paper. Freeze them for an hour until solid, then transfer them to a freezer bag. When you’re ready to bake, just pop them in the oven straight from the freezer, adding an extra minute or two to the baking time. For more tips on freezing cookie dough, check out Food Network.
Feel free to reach out with any more questions or tips on these delicious cookies!
Conclusion on Chocolate Thumbprint Cookies
Why you should make these cookies today!
Why wait for a special occasion to indulge in delicious Chocolate Thumbprint Cookies? These treats are not only simple to make, but they also deliver a delightful combination of flavors and textures that will impress everyone. Imagine soft, chewy cookies with rich chocolate centers, perfect for sharing (or keeping all to yourself!).
Whether you’re hosting friends or just need a sweet pick-me-up, these cookies will surely brighten your day. Plus, they pair beautifully with a warm cup of coffee or a chilled glass of milk! So gather your ingredients and make them today—your taste buds will thank you! For more creative recipes, check out The Spruce Eats for inspiration.
PrintChocolate Thumbprint Cookies: Indulgent Treats for Any Occasion

Delicious and rich chocolate thumbprint cookies filled with creamy chocolate ganache. Perfect for any celebration or just a sweet treat at home.
- Prep Time: 20 minutes
- Cook Time: 12 minutes
- Total Time: 32 minutes
- Yield: 24 cookies 1x
- Category: Dessert
- Method: Baking
- Cuisine: American
- Diet: Vegetarian
Ingredients
- 1 cup unsalted butter, softened
- 1 cup granulated sugar
- 2 large eggs
- 2 teaspoons vanilla extract
- 2 cups all-purpose flour
- 1/2 cup cocoa powder
- 1 teaspoon baking powder
- 1/4 teaspoon salt
- 1 cup chocolate chips
Instructions
- Preheat the oven to 350°F (175°C).
- In a large bowl, cream together the butter and sugar until light and fluffy.
- Beat in the eggs one at a time, then stir in the vanilla.
- Combine the flour, cocoa powder, baking powder, and salt; gradually add to the wet mixture.
- Roll dough into small balls and place them on a baking sheet.
- Make a small indentation in the center of each ball.
- Bake for about 12 minutes, then remove from oven.
- Let them cool completely before filling the indentations with chocolate chips melted.
Notes
- For a richer filling, use dark chocolate chips.
- Chill the cookie dough for 30 minutes before baking for more structure.
Nutrition
- Serving Size: 1 cookie
- Calories: 120
- Sugar: 8g
- Sodium: 50mg
- Fat: 8g
- Saturated Fat: 5g
- Unsaturated Fat: 2g
- Trans Fat: 0g
- Carbohydrates: 15g
- Fiber: 1g
- Protein: 2g
- Cholesterol: 30mg
Keywords: Chocolate Thumbprint Cookies, cookies, chocolate, dessert