Introduction to Mini Cannoli Cups
What are Mini Cannoli Cups?
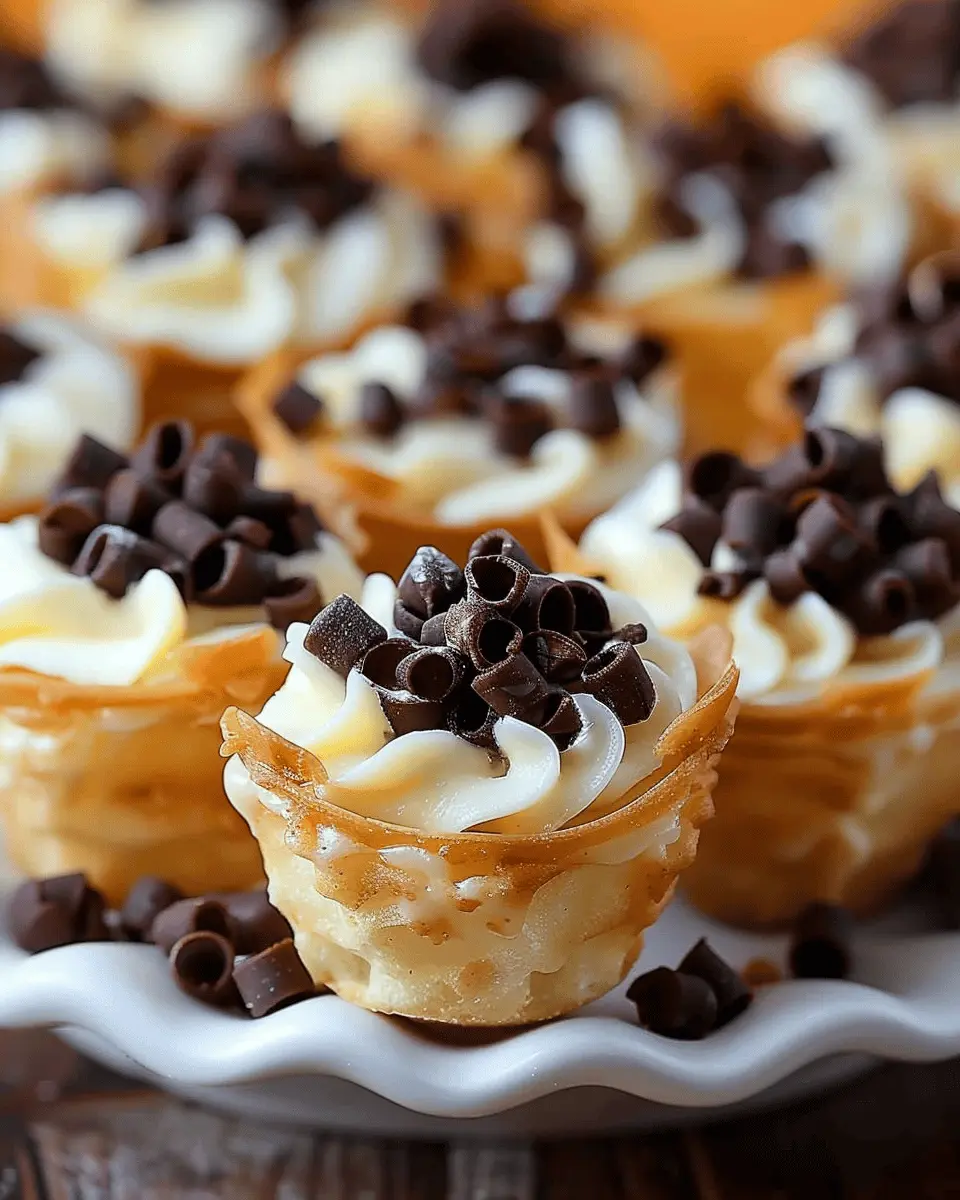
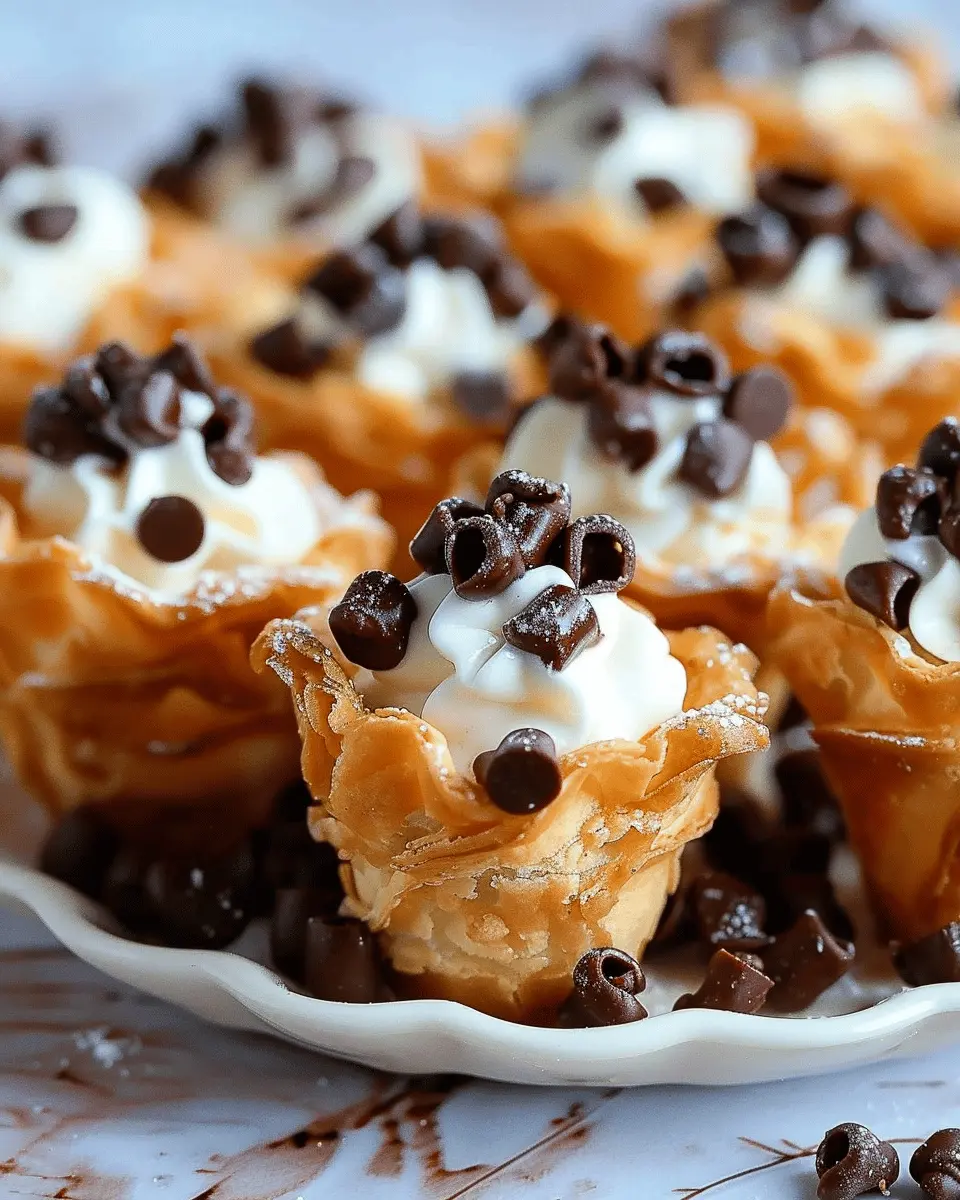
Mini Cannoli Cups are a delightful twist on the traditional Italian dessert, cannoli. Instead of the classic tube-shaped pastry filled with sweetened ricotta cheese, these bite-sized cups offer the same rich flavors in a fun and approachable format. Picture this: delicate, crisp pastry shells filled with a luscious mixture of ricotta, confectioners’ sugar, and vibrant chocolate chips, all elegantly presented in a little cup. They’re not just a feast for the palate but also for the eyes! If you’re a fan of desserts that deliver a combination of textures and flavors, Mini Cannoli Cups are sure to impress.
While traditional cannoli can be somewhat daunting to make, Mini Cannoli Cups are surprisingly easy and quick. This makes them an excellent choice for those who are new to baking or simply looking for a fun way to express their culinary creativity. You can easily customize the filling, adding flavors like vanilla or citrus zest, or even experimenting with seasonal ingredients. The possibilities are endless!
Why are they perfect for homemade indulgence?
If you’re looking for a dessert that feels gourmet but is entirely achievable at home, then Mini Cannoli Cups are your answer. Here’s why they shine in the realm of homemade indulgence:
-
Portion Control: Their mini size allows for enjoying a little sweetness without going overboard. Plus, they’re perfect for serving at gatherings, making it easy for guests to enjoy just a taste.
-
Versatility: You can tailor the flavors of your filling to suit any occasion, whether it’s adding a festive twist for holidays or keeping it classic for everyday enjoyment. Have you considered using seasonal fruits to enhance the flavors?
-
Aesthetic Appeal: These little treats are visually stunning, making them ideal for entertaining. Your friends will be impressed and curious about how you whipped up such elegant treats.
-
Ease of Preparation: Even novice bakers will find this recipe straightforward. With just a few ingredients and steps involved, it simplifies the process without sacrificing flavor.
Ready to indulge in these delicious bites? As you gather your ingredients, keep in mind that the key to amazing Mini Cannoli Cups lies in quality components. For tips on choosing the best ricotta cheese, check out this trusted source, which provides insights catered to dessert lovers.
Try your hand at making Mini Cannoli Cups, and let their delightful flavor and texture brighten up your dessert table!

Ingredients for Mini Cannoli Cups
Essential ingredients for flavor
Creating delicious Mini Cannoli Cups starts with the right ingredients to ensure that every bite bursts with flavor. Here’s what you’ll need:
- Cannoli shells: You can either make them from scratch or buy pre-made ones. Homemade shells tend to have a unique crispy texture, while store-bought are convenient and save time.
- Ricotta cheese: This is the heart of your filling. Make sure to choose high-quality whole milk ricotta for a rich taste.
- Powdered sugar: This sweetens your filling and adds that delightful creaminess.
- Vanilla extract: A splash of pure vanilla will elevate the flavor profile.
- Mini chocolate chips: These are a delightful surprise and add a bit of creaminess to your filling.
Optional garnishes and variations
To make your Mini Cannoli Cups even more delightful, consider these fun garnishes and variations:
- Chopped pistachios: Add a sprinkle of these for a crunchy texture.
- Fresh fruit toppings: Raspberries or strawberries not only enhance the presentation but also introduce a tart sweetness.
- Flavored extracts: Try adding almond or orange extract for a twist on the classic taste.
By mixing and matching these ingredients and garnishes, your Mini Cannoli Cups can be personalized to suit any occasion. Experimenting with flavors is half the fun! For tips on mastering the art of homemade cannoli shells, check out this cooking guide.
Step-by-step preparation of Mini Cannoli Cups
Step 1: Gather your ingredients
Before we dive into making these delightful Mini Cannoli Cups, let’s ensure you have everything you need. This will make the entire process smooth and enjoyable! Here’s a straightforward list of ingredients:
-
For the crusts:
-
1 cup all-purpose flour
-
1 tablespoon granulated sugar
-
½ teaspoon salt
-
¼ cup cold unsalted butter, cubed
-
1 egg yolk
-
3 tablespoons cold water
-
For the filling:
-
1 cup ricotta cheese (preferably whole milk)
-
½ cup powdered sugar
-
½ teaspoon vanilla extract
-
½ cup mini chocolate chips
-
Zest from one orange (optional for a twist)
Once you have these ingredients, you’re ready to start creating these heavenly treats!
Step 2: Prepare the crust base
To make sure your Mini Cannoli Cups have that perfect crunchy texture, we start with the crust. In a large bowl, mix the all-purpose flour, granulated sugar, and salt. This simple mixture sets the stage for your crust.
Next, you’ll want to cut in the cold butter using a pastry cutter or your fingertips, mixing until the mixture resembles coarse crumbs. Don’t rush this step—it’s essential for that flaky finish! Once you have those crumbs, stir in the egg yolk and cold water until just combined. If the dough feels too dry, you can add a teaspoon more of water.
Shape the dough into a ball, wrap it in plastic wrap, and refrigerate for about 30 minutes. This helps firm it up, making it easier to work with later.
Step 3: Bake the mini crusts to perfection
Preheat your oven to 375°F (190°C) and prepare a mini muffin pan by lightly greasing it. On a floured surface, roll out your chilled dough to about 1/8-inch thickness. Using a round cookie cutter or a glass, cut out circles and gently press each circle into a well of your muffin pan.
These little cups need some air while baking, so poke a few holes in the bottom with a fork. Bake for 10-12 minutes or until they are lightly golden—your kitchen will smell heavenly!
Once you pull them out, let them cool for a few minutes in the pan before transferring them to a wire rack to cool completely. Trust us, the wait will be worth it!
Step 4: Create the creamy ricotta filling
While the crusts are cooling, let’s whip up that creamy filling! In a mixing bowl, add the ricotta cheese, powdered sugar, and vanilla extract. Beat with an electric mixer until the mixture is smooth and well combined. The key here is to taste! Adjust the sweetness according to your preference.
For an added zing, fold in the orange zest and mini chocolate chips. This will provide a lovely surprise element for anyone biting into your Mini Cannoli Cups!
Step 5: Pipe and fill the baked cups
Once your crusts are cool, it’s time to fill them! You can spoon the ricotta mixture into a piping bag fitted with a large round tip for a neater presentation or simply use a small spoon.
Carefully pipe or fill each at the center of the mini crusts. The fun part is you can overfill them slightly—they’ll look irresistible!
Step 6: Final touches and presentation
Now for the cherry on top—or in this case, the drizzle! To elevate your Mini Cannoli Cups, dust them with powdered sugar or drizzle with melted chocolate. You can even top them with a sliver of candied orange peel or some extra chocolate chips for added flair.
Serve them on a beautiful platter at your next gathering or simply treat yourself when you deserve a sweet night in. With these Mini Cannoli Cups, you’re sure to impress family and friends alike.
And before you go, we recommend checking out additional serving suggestions or variations on sites like AllRecipes that will help you explore the world of dessert further. Enjoy your delicious creation!
Variations on Mini Cannoli Cups
When it comes to Mini Cannoli Cups, the classic filling of sweet ricotta is just the beginning. Get creative by layering in different flavors and textures! Here are some delightful twists that will elevate your dessert game.
Chocolate lovers’ twist
For those who can’t resist the allure of chocolate, consider whipping up a chocolate-infused filling. Simply add cocoa powder to your ricotta mixture for a rich flavor that’s sure to satisfy. You can also fold in some mini chocolate chips for extra sweetness. For a dramatic finish, drizzle melted dark chocolate over the top of your cups before serving. Want even more indulgence? Try dipping the edges of your cups in chocolate for a delightful surprise with each bite!
Fruity additions for summer vibes
Looking to bring a fresh touch to your Mini Cannoli Cups? Add some seasonal fruit! Mix berries, like strawberries or blueberries, into your ricotta or use them as a topping. They not only taste delicious but also add a vibrant burst of color that’s perfect for summer gatherings. For a tropical twist, consider mixing in some pineapple or mango chunks for a refreshing taste. Fruity toppings not only look great but also cut through the richness of the filling, making each bite refreshing.
Nutty variations for added crunch
If you’re in the mood for some added texture, consider incorporating nuts into your Mini Cannoli Cups. Chopped pistachios or hazelnuts make for a delectable crunch. You can sprinkle them on top or fold them directly into the filling. Not only do they enhance the flavor, but they also provide a beautiful contrast to the creamy filling. For an even richer experience, you might toast the nuts before adding them to your cups for a deeper flavor profile.
These variations make it easy to customize your Mini Cannoli Cups to suit any occasion or personal taste. Let your creativity flow and enjoy each delicious experience!
Cooking tips and notes for Mini Cannoli Cups
Tips for perfect pastry crust
Achieving the right texture for your Mini Cannoli Cups starts with the pastry crust. Here are a few pro tips to ensure your crust is nothing short of perfection:
- Chill your dough: After mixing, wrap your dough in plastic wrap and refrigerate it for at least 30 minutes. This helps relax the gluten and makes the dough easier to roll out.
- Roll thinly: Aim for about 1/8 inch in thickness. Thinner crusts will bake into a delightful crunch rather than a tough bite.
- Use a muffin tin: To shape your cups, carefully mold the dough around the cups of a muffin tin. This method ensures uniformity and keeps your shells nice and secure.
Notes on ricotta preparation
The filling is just as critical as the crust when it comes to Mini Cannoli Cups. Here’s how to prepare the ricotta:
- Choose quality ricotta: Opt for whole milk ricotta for the creamiest texture. Check out this guide from The Kitchn for tips on selecting the best.
- Drain excess moisture: To prevent a soggy filling, drain your ricotta for at least 30 minutes before mixing. You can use a fine-mesh sieve or cheesecloth for best results.
- Add flavor: Stir in a touch of vanilla extract and powdered sugar to elevate the sweetness. Mixing in chocolate chips or candied citrus zest can add delightful surprises.
By following these tips, your Mini Cannoli Cups will impress at any gathering!

Serving suggestions for Mini Cannoli Cups
How to present for parties
When planning a gathering, presentation can elevate your Mini Cannoli Cups from delightful to dazzling. Use clear cupcake liners or small glass cups to showcase these treats. A colorful platter can enhance their visual appeal. You might even sprinkle some chopped pistachios or mini chocolate chips on top for a pop of color and texture. For added flair, garnish with fresh mint leaves or edible flowers. Don’t forget to label your dessert table; creative name cards can pique guests’ interest!
Ideal pairings for drinks and other desserts
Considering what to serve alongside your Mini Cannoli Cups? Opt for light beverages such as herbal teas or rich, creamy coffee options. Both can complement the sweet, creamy filling beautifully. Dessert-wise, think small! Light fruit tarts or cheesecake bites make excellent companions, allowing guests to enjoy a variety of textures and flavors.
Looking for inspiration? Check out The Spruce Eats for more ideas on matching drinks and desserts. Pairing flavors can turn a simple gathering into a memorable celebration!
Time breakdown for Mini Cannoli Cups
Preparation time
Getting your ingredients and tools together will take about 20 minutes. This is a great time to crank up some music and create your perfect workspace. You’ll need to mix your cannoli filling and prepare the mini pastry cups.
Baking time
Baking these delightful Mini Cannoli Cups is quick and easy, only requiring about 10-12 minutes in the oven. It’s the perfect time to tidy up your kitchen or enjoy a leisurely cup of coffee.
Total time
In just 30-35 minutes, you can whip up a batch of these charming treats. Think of it as a mini break from your day, resulting in a delicious reward. For more delicious recipes or tips on perfecting your baking skills, check out resources from America’s Test Kitchen or Serious Eats. Enjoy!
Nutritional Facts for Mini Cannoli Cups
Calories per Serving
If you’re wondering about the calories in Mini Cannoli Cups, you’ll be pleased to know they’re relatively manageable. Each cup contains around 120-150 calories, depending on your choice of filling and toppings. This makes them a delightful treat that won’t completely derail your nutrition goals.
Macronutrient Breakdown
In terms of macronutrients:
- Carbohydrates: 18g
- Protein: 3g
- Fat: 7g
These Mini Cannoli Cups offer a sweet combination of flavors while providing a decent balance of nutrients for an occasional indulgence. To keep them on the lighter side, consider using part-skim ricotta cheese for the filling and opt for a dusting of cocoa powder instead of heavy toppings.
For more insights on healthy desserts, check out this nutrition article by the Academy of Nutrition and Dietetics.
With every bite, these little cups serve as a reminder that you can enjoy delicious treats without compromising your health—after all, balance is key in any diet!
FAQs about Mini Cannoli Cups
Can I make Mini Cannoli Cups ahead of time?
Absolutely! Mini Cannoli Cups can be prepared ahead of time, which is perfect for entertaining. You can fill the cups with the ricotta mixture and store them in the fridge for up to a day. However, it’s best to fill them just before serving to keep the shells crispy and prevent them from getting soggy. If you need to prepare in advance, consider making the shells and the filling separately. You can find more tips on preparing desserts ahead of time at sites like Food Network.
What other fillings can I use?
While the classic ricotta filling is a favorite, feel free to get creative! Here are a few delicious alternatives for your Mini Cannoli Cups:
- Chocolate Ricotta: Mix in cocoa powder or melted chocolate for a rich twist.
- Mascarpone Whip: This indulgent option adds a creamy texture.
- Fruit-Based Fillings: Consider using pureed fruits like strawberries or even lemon curd for a zesty take.
- Nut Butter: Almond or peanut butter mixed with a pinch of sugar creates a delightful surprise.
The sky’s the limit! You could even look at Bon Appétit for inspiration on unexpected dessert fillings.
How do I store leftover Mini Cannoli Cups?
If you find yourself with leftover Mini Cannoli Cups, store them in an airtight container in the refrigerator. The filled cups are best consumed within a day or two. To maintain that crispy shell, keep the filling separate until you’re ready to enjoy them again. Just reassemble with your filling, and you’re all set for your dessert cravings! Don’t dispense with the leftovers—get creative and use them as a charming office treat or as an unexpected snack while binge-watching your favorite show.
Conclusion on Mini Cannoli Cups
Making Mini Cannoli Cups at home is not just a delightful treat; it’s a way to express your creativity in the kitchen. The crispy shells filled with sweet, creamy ricotta are perfect for impressing friends or indulging yourself after a long day. Plus, they are surprisingly easy to whip up with minimal ingredients.
Imagine serving these delicious bites at your next gathering, or enjoying them during a cozy movie night. The versatility in toppings allows you to customize them to your taste, ensuring everyone will have their favorite. If you’re inspired, check out more dessert ideas here. With Mini Cannoli Cups, you’re bound to leave a lasting impression!
PrintMini Cannoli Cups: Easy Indulgence for Your Sweet Tooth

These Mini Cannoli Cups are a delightful treat perfect for satisfying your sweet tooth while being easy to make!
- Prep Time: 15 minutes
- Cook Time: 0 minutes
- Total Time: 30 minutes
- Yield: 12 servings 1x
- Category: Dessert
- Method: No-Bake
- Cuisine: Italian
- Diet: Vegetarian
Ingredients
- 1 cup ricotta cheese
- 1/2 cup powdered sugar
- 1 teaspoon vanilla extract
- 1/2 cup mini chocolate chips
- 12 mini phyllo cups
- 2 tablespoons chopped pistachios (optional)
Instructions
- In a medium bowl, mix the ricotta cheese, powdered sugar, and vanilla extract until smooth.
- Fold in the mini chocolate chips.
- Carefully spoon the mixture into the mini phyllo cups.
- Sprinkle with chopped pistachios if desired.
- Chill in the refrigerator for at least 30 minutes before serving.
Notes
- For extra flavor, try adding a pinch of cinnamon to the ricotta mixture.
- Mini Cannoli Cups can be assembled a few hours ahead of time for convenience.
Nutrition
- Serving Size: 1 cup
- Calories: 120
- Sugar: 10g
- Sodium: 50mg
- Fat: 4g
- Saturated Fat: 2g
- Unsaturated Fat: 1g
- Trans Fat: 0g
- Carbohydrates: 16g
- Fiber: 1g
- Protein: 3g
- Cholesterol: 10mg
Keywords: Mini Cannoli Cups, cannoli, dessert, easy dessert