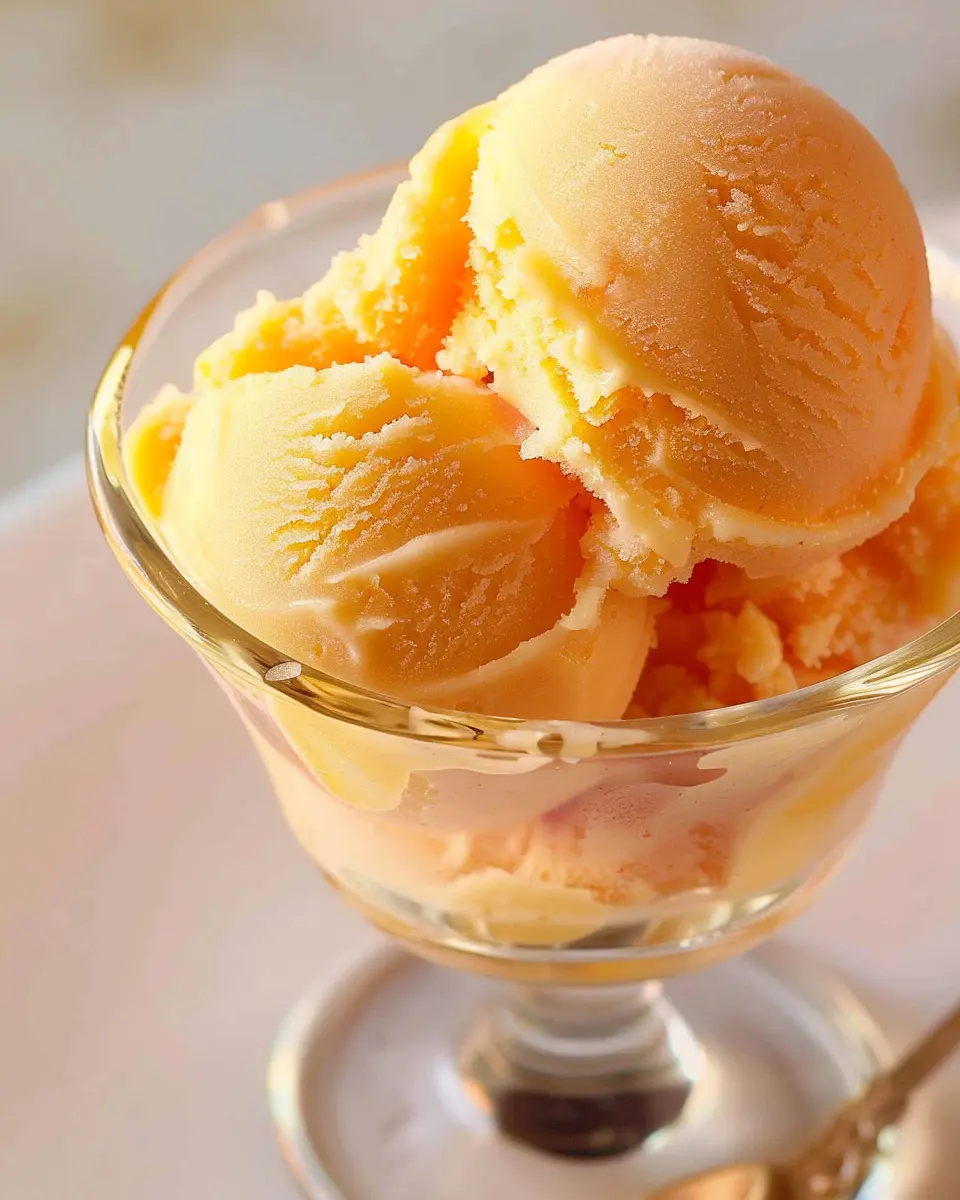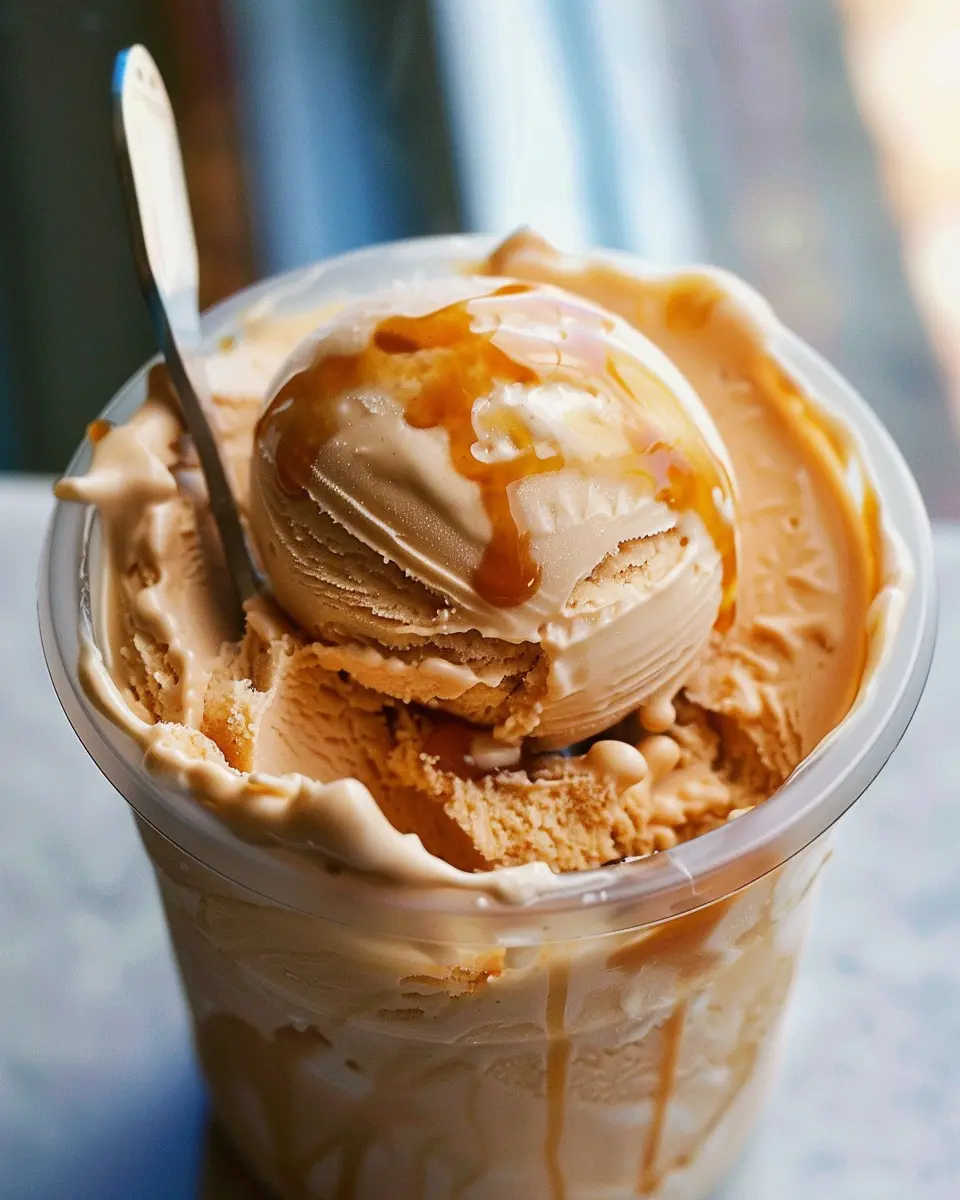
Introduction to Ninja Creami Salted Caramel Ice Cream
When it comes to satisfying your sweet tooth, nothing is quite as delightful as homemade ice cream. For young professionals juggling busy work schedules and social lives, investing in a Ninja Creami can transform your dessert experience. Imagine whipping up a creamy, dreamy bowl of Ninja Creami salted caramel ice cream right in your kitchen!
Why settle for store-bought when you can customize every scoop to suit your taste? Homemade ice cream is not just about flavor; it’s about quality. When you control the ingredients, you can opt for rich, organic creams and natural sweeteners, steering clear of preservatives and artificial flavors found in many commercial products. According to the USDA, making your own food is generally healthier, giving you the peace of mind that what you’re indulging in is made with love—and yes, maybe a dash of sea salt for that perfect salted caramel flavor.
The Joy of Customization
One of the most exciting aspects of making Ninja Creami salted caramel ice cream is the endless possibilities. Want it a little saltier? Go ahead and add more sea salt; prefer a richer caramel? Experiment with the caramel sauce until it’s just how you like it. The freedom to experiment can also be a creative outlet, something many busy professionals find a refreshing reprieve from their hectic lives.
- Health-Conscious Options: Swap out traditional sugars for alternatives like maple syrup or honey.
- Dietary Preferences: Use dairy-free cream for your non-dairy friends or add in mix-ins like nuts or chocolate chunks based on your cravings.
Engaging in the Process
Making ice cream can also be a delightful activity—perfect for hosting friends or winding down after a long week. Picture this: a casual Friday evening where you invite a few friends over, create your Ninja Creami salted caramel ice cream together, and share laughs amidst the sweet aroma filling your kitchen.
You’ll have delicious dessert, colorful memories, and a fun bonding experience—all within a few hours! Explore more about homemade ice cream options on reputable sites like Serious Eats for tips and flavor inspirations.
In the fast-paced world we live in, why not slow down for a moment and savor the little pleasures? With your own Ninja Creami, you’re not just making ice cream; you’re creating joy. So, grab your machine, and let’s dive into the creamy goodness!
Ingredients for Ninja Creami Salted Caramel Ice Cream
Essential ingredients for a creamy delight
To whip up your own Ninja Creami Salted Caramel Ice Cream, you’ll need a few essential ingredients that come together to create an incredibly luxurious treat. Picture this: creamy base, luscious caramel, and just the right touch of salt. Here’s what you’ll need:
- 2 cups heavy cream
- 1 cup whole milk
- 1 cup granulated sugar
- 1/2 cup caramel sauce (store-bought or homemade)
- 1 teaspoon sea salt
- 1 tablespoon vanilla extract
These ingredients are easily accessible and will set you up for ice cream success. Feel free to check out high-quality caramel sauce options from brands like Ghirardelli to save some time!
Optional toppings to elevate your ice cream experience
Now that you have the base, why not take your Ninja Creami Salted Caramel Ice Cream to the next level? Consider adding some optional toppings that can bring a delightful crunch or additional flavor:
- Chopped pecans or walnuts for a nutty twist
- Extra caramel drizzle for that beautiful presentation
- Whipped cream for a classic touch
- Sea salt flakes to enhance the salty sweetness
Mix and match these toppings to create your perfect scoop! It’s all about customizing your dessert experience. Enjoy crafting your masterpiece!
Step-by-step preparation of Ninja Creami Salted Caramel Ice Cream
Creating homemade ice cream at home can be an exciting adventure, especially when you have the Ninja Creami on your side. This delightful kitchen gadget transforms your dreams of creamy frozen treats into reality with ease. If you’ve been yearning for a luscious Ninja Creami salted caramel ice cream, you’re in the right place! Let’s dive into the steps of making this indulgent dessert.
Gather your ingredients
Before you even think about turning on your Ninja Creami, it’s crucial to assemble all the necessary ingredients. Here’s what you’ll need for that rich and buttery homemade salted caramel ice cream:
- 2 cups heavy cream: For that delicious creaminess.
- 1 cup whole milk: Adds depth and texture.
- ¾ cup granulated sugar: Sweetness is key!
- 1 teaspoon vanilla extract: A classic flavor enhancer.
- ½ teaspoon sea salt: This is essential for that salted caramel punch.
- ¾ cup prepared caramel sauce: You can either make your own or buy high-quality store-bought.
Tip: Quality makes a difference! Look for organic and all-natural ingredients for the best flavor.
Mix ingredients in the Ninja Creami pint container
Now that you’ve gathered everything, it’s time to blend them together. Grab your Ninja Creami pint container and follow these steps:
- Combine the ingredients: In the pint container, add the heavy cream, whole milk, sugar, vanilla extract, sea salt, and caramel sauce. Use a whisk or spoon to thoroughly mix everything until the sugar is dissolved and the mixture is well-combined.
- Leave some room: Make sure to leave about an inch of space at the top of the container to allow for expansion while freezing.
This is the stage where you can get creative! Feel free to add in any extras like a sprinkle of chocolate chips or swirls of additional caramel.
Freezing your ice cream mixture
Once everything is mixed together, it’s time for the mixture to hit the freezer.
- Seal the pint: Secure the lid tightly on the pint container to prevent freezer particles from making their way into your mixture.
- Freeze: Place the pint in your freezer for a minimum of 24 hours. The longer it freezes, the better the texture, so resist the temptation until it’s completely frozen.
Pro tip: Keeping a batch of prepared Ninja Creami salted caramel ice cream in your freezer means spontaneous dessert nights!
The perfect spin: operating the Ninja Creami
When you’re ready to enjoy your homemade creation, it’s time for the ninja magic.
- Remove the pint from the freezer: Let it sit at room temperature for about 5-10 minutes, which helps achieve a creamier consistency.
- Install it in the machine: Pop the container into the Ninja Creami. Lock it into place according to the machine’s instructions.
- Crank out that icy goodness: Select the “Ice Cream” function and let the Ninja Creami work its magic for about 2-3 minutes.
You’ll watch in wonder as your mixture transforms into that dreamy Ninja Creami salted caramel ice cream.
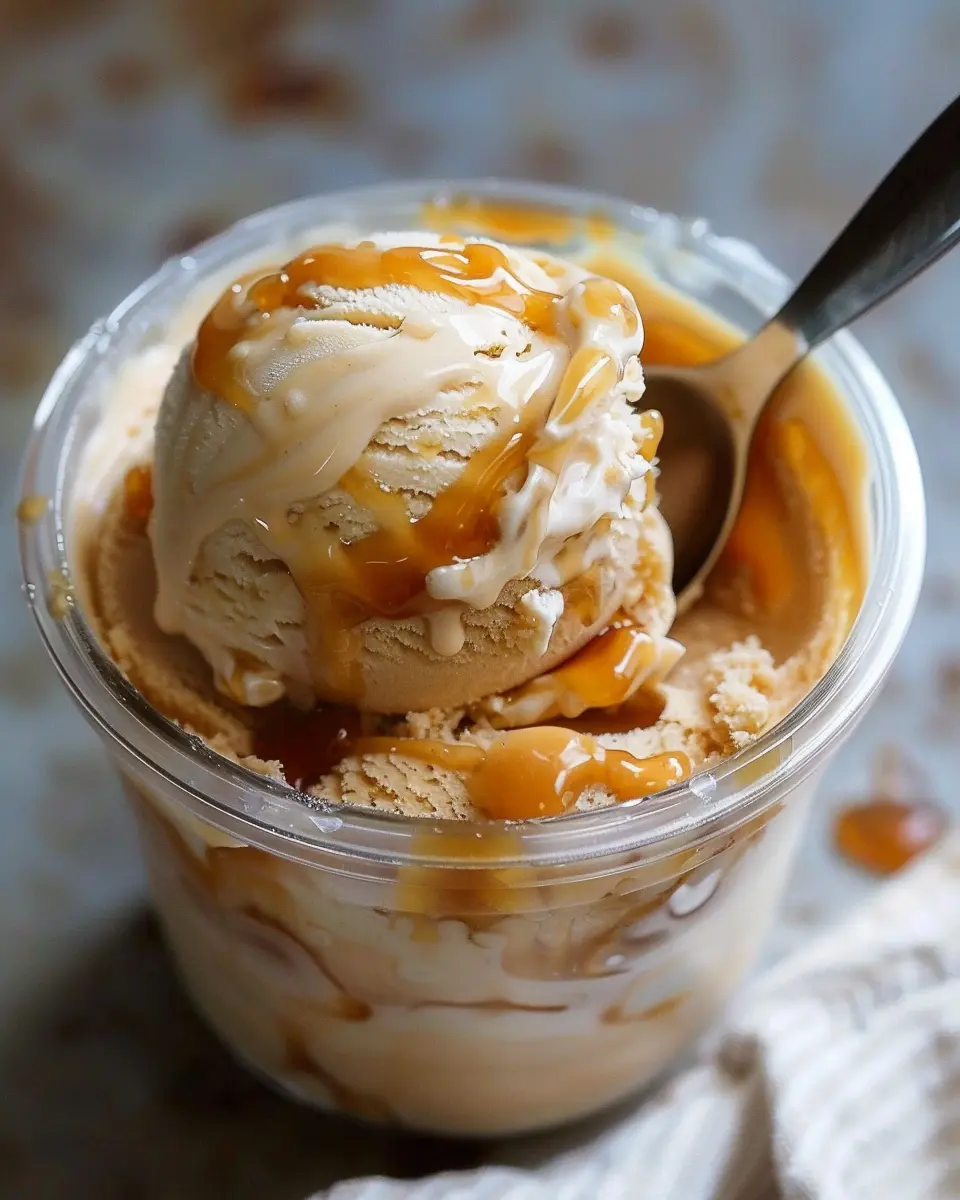
Adjusting consistency and adding toppings
So, you’ve spun your ice cream, but how does it look? If it’s still a bit gritty or too hard, don’t fret—this part fixes everything.
- Adjust consistency: If necessary, you can use the “Re-spin” function. Sometimes, two spins can make it perfect!
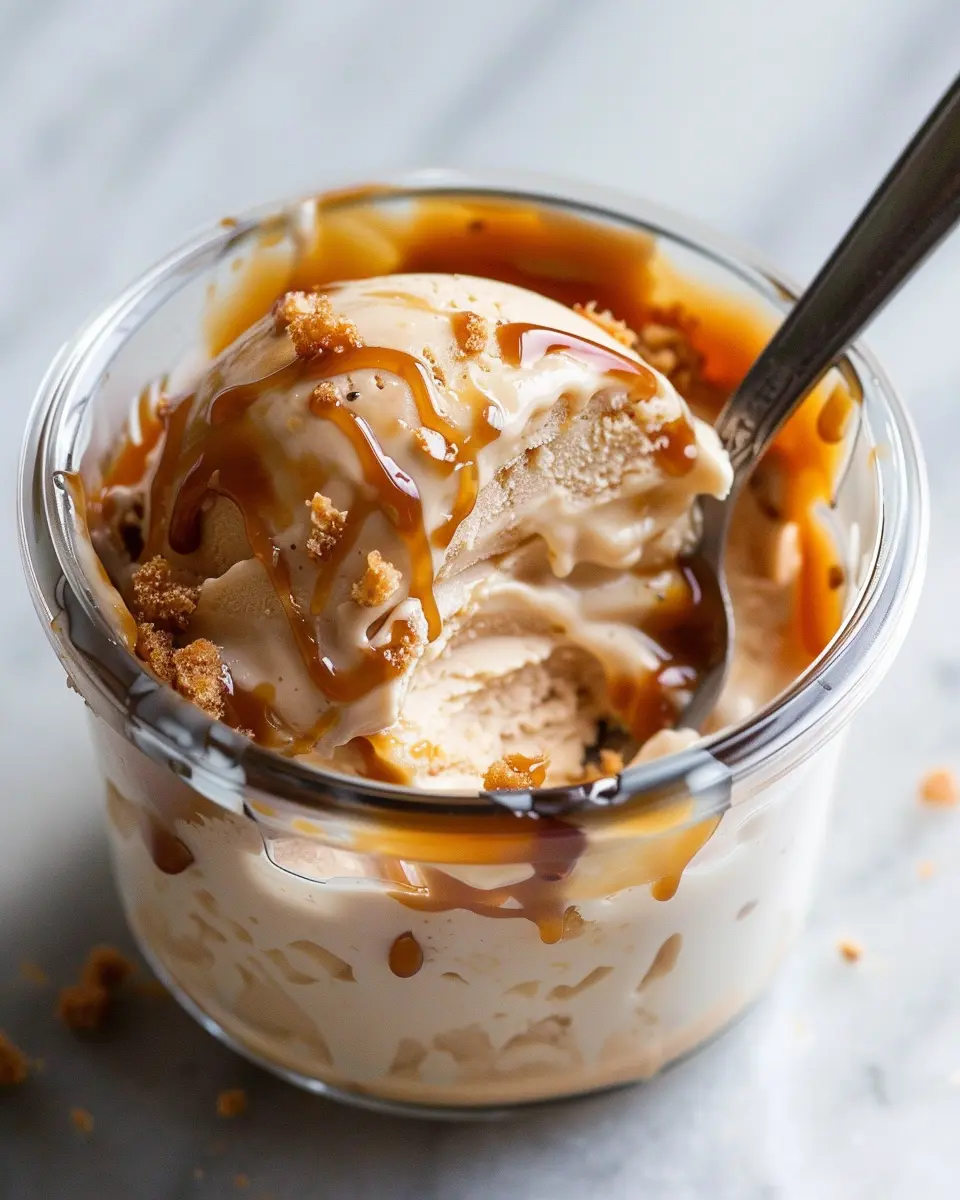
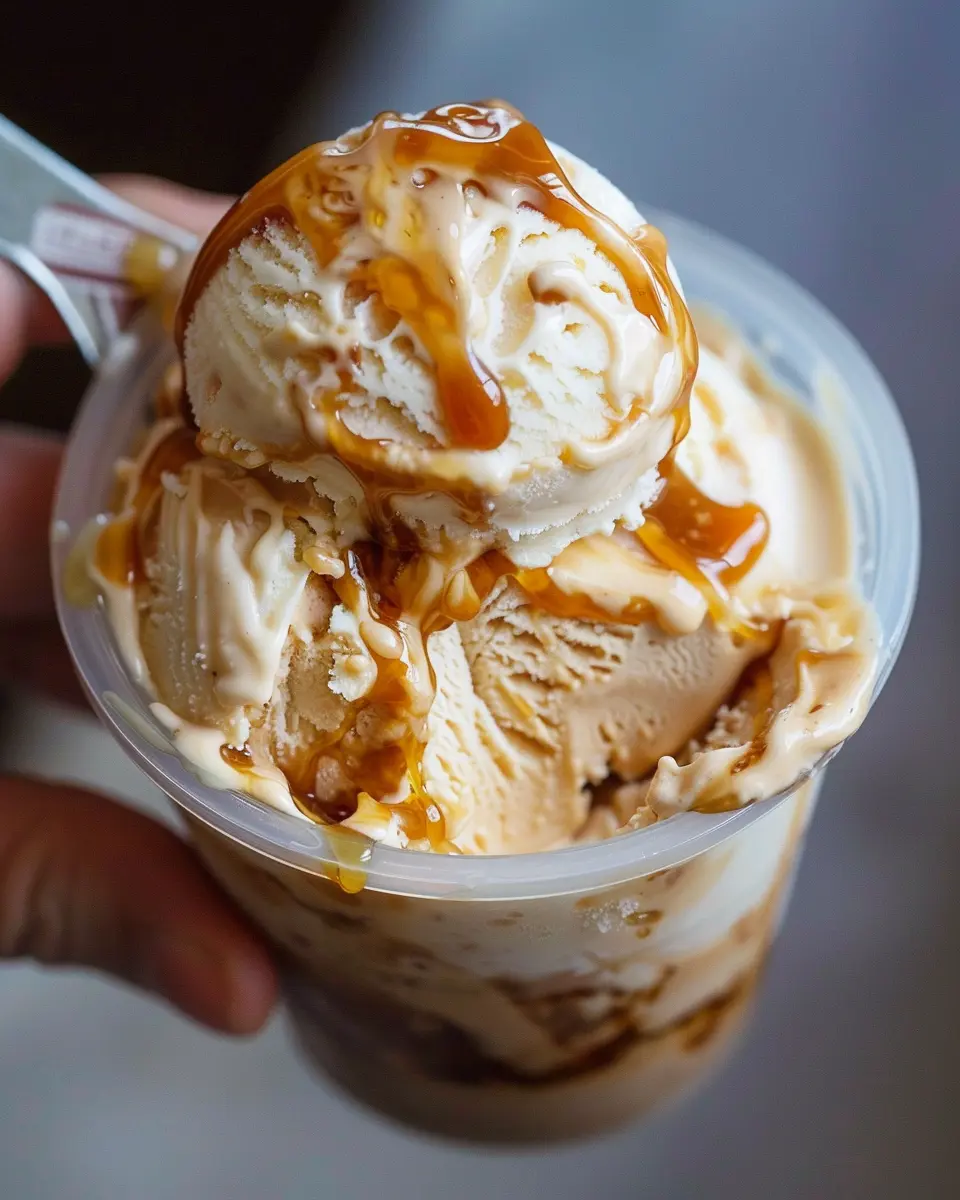
- Add toppings: For the finishing touch, consider drizzling some more caramel sauce on top or sprinkling a dash of sea salt for added flavor. Crushed nuts, chocolate chips, or even a scoop of whipped cream can take your ice cream to the next level!
Before you know it, you’ll have a delicious bowl of Ninja Creami salted caramel ice cream, perfect for sharing (or keeping all to yourself). Enjoy every scoop!
Curious for more dessert ideas? Check out huffpost.com for additional recipes and inspirations!
Variations on Ninja Creami Salted Caramel Ice Cream
Alternative Protein Flavors for a Different Twist
If you’re looking to switch things up with your Ninja Creami salted caramel ice cream, consider experimenting with protein-based flavors! Adding a scoop of protein powder can transform your treat into a delicious post-workout recovery snack. Here are some great options you can try:
- Chocolate protein powder: It adds a rich flavor that pairs beautifully with salted caramel.
- Vanilla protein powder: A subtle flavor enhancement that keeps the focus on the caramel.
- Coffee protein powder: For that extra kick, coffee and caramel are a match made in heaven!
Mixing in these protein powders not only boosts the nutritional value but also gives you a fun new flavor profile.
Making a Vegan Version of Salted Caramel Ice Cream
Who says dairy lovers should have all the fun? Transforming your Ninja Creami salted caramel ice cream into a vegan delight is easy and equally delicious! Here’s how:
- Use almond or coconut milk instead of regular dairy. These plant-based milks provide a creamy texture while adding their own hint of flavor.
- Opt for coconut cream for an ultra-rich experience. This will elevate your ice cream’s consistency and flavor.
- Swap out regular caramel sauce for a vegan version, which typically uses coconut sugar, maple syrup, or dates for sweetness with that essential salty kick.
This way, you can enjoy a comforting bowl of salted caramel ice cream while sticking to your plant-based lifestyle. For more tips on vegan ice cream recipes, check out Minimalist Baker, one of my favorite resources!
By trying these variations, you can elevate your Ninja Creami salted caramel ice cream experience, whether you’re after some extra protein or wish to maintain a vegan diet. Enjoy experimenting!
Cooking Tips and Notes for Ninja Creami Salted Caramel Ice Cream
Tips for Achieving Creamy Texture Every Time
For the Ninja Creami Salted Caramel Ice Cream to come out perfectly creamy, follow these essential tips:
- Chill Properly: Make sure your ice cream base is properly chilled for at least 4 hours before processing. This helps achieve that velvety texture.
- Avoid Overprocessing: Blend just until combined. Overblending can lead to a grainy texture, so stop once you see a uniform mixture.
- Use Whole Ingredients: Opt for full-fat cream and milk. The richness of these ingredients contributes to that sought-after creaminess.
Recommended Ingredients for the Best Flavor
When it comes to flavor, quality matters! Here’s what to consider for your Ninja Creami Salted Caramel Ice Cream:
- Real Caramel Sauce: Skip the processed stuff. Use homemade or high-quality store-bought caramel for that deep, authentic flavor.
- Sea Salt: A sprinkle of flaky sea salt can elevate your caramel ice cream, enhancing its richness perfectly.
- Vanilla Extract: Always use pure vanilla extract instead of imitation for a more fragrant and robust flavor.
For more creaminess and flavor, consider dairy alternatives from trusted sources like The Dairy Alliance for tips on ingredient choices. Enjoy creating your sweet masterpiece!
Serving suggestions for Ninja Creami Salted Caramel Ice Cream
Creative ways to serve and enjoy your ice cream
Looking to take your Ninja Creami Salted Caramel Ice Cream to the next level? Serving it in a waffle cone or a beautifully crafted sundae bowl can make a delightful difference. Try topping it with chopped nuts, like pecans or walnuts, for that extra crunch. Another stylish option? Serve scoops on a bed of warm brownies or chocolate cake—trust me, the combination of warm and cold is pure bliss.
Pairing suggestions with desserts or snacks
When it comes to sides, Ninja Creami Salted Caramel Ice Cream pairs beautifully with an array of treats. Think of serving it alongside:
- Fresh apple slices with a drizzle of caramel sauce
- A slice of pumpkin pie for that cozy seasonal touch
- Turkey bacon bites glazed with maple syrup for a sweet-savory twist
For an unexpected flavor pairing, try it with crispy chicken ham sliders or whole-grain crackers. This delightful contrast will keep your taste buds guessing! Don’t forget to explore more creative combinations; the possibilities are endless! If you’re searching for inspiration, check out sites like Food Network or Bon Appétit.
Time breakdown for Ninja Creami Salted Caramel Ice Cream
Preparation time
Making your Ninja Creami Salted Caramel Ice Cream starts with about 15 minutes of prep. You’ll need to gather your ingredients, whip together the base, and infuse it with that rich caramel goodness. This is the fun part—mixing, tasting, and adjusting to your preferred level of sweetness.
Freezing time
After preparation, your ice cream mixture needs to chill in the freezer for at least 24 hours. This is crucial because a fully chilled base is key for achieving that creamy texture when you use your Ninja Creami. So, if you want to dive into your delicious creation, make sure to plan ahead!
Total time
In total, expect about 24 hours and 15 minutes from start to finish. While that might sound like a long time, most of it is passive waiting. Just imagine the delighted expression on your friends’ faces when you serve them a bowl of this homemade Ninja Creami Salted Caramel Ice Cream! You can find more tips on ice cream making at Serious Eats to refine your technique.
Nutritional Facts for Ninja Creami Salted Caramel Ice Cream
Calories and Key Nutritional Information
When you whip up Ninja Creami Salted Caramel Ice Cream, you’re treating yourself to a delightful dessert without the guilt. Each serving typically contains around 150 calories, making it a satisfying treat that fits into many diets. The nutritional breakdown usually includes:
- Total Fat: 7g
- Saturated Fat: 4g
- Carbohydrates: 20g
- Sugars: 14g
- Protein: 2g
These numbers can vary slightly based on your ingredient choices, especially if you opt for lower-fat dairy alternatives or sweeteners.
Benefits of the Chosen Ingredients
Each component of your Ninja Creami Salted Caramel Ice Cream recipe brings unique benefits. For instance, using grass-fed dairy can provide a higher concentration of nutrients like Omega-3 fatty acids and vitamin K2, which are essential for heart health. Moreover, natural sweeteners, such as maple syrup or honey, often contain antioxidants that can help combat inflammation.
Interestingly, caramel itself, when made from natural ingredients, can also evoke feelings of comfort and nostalgia—think childhood treats! Don’t just take our word for it; studies published by the Journal of Nutritional Biochemistry highlight the benefits of incorporating diverse sweet treats into a balanced diet.
So, why not indulge in this delicious, creamy delight that’s enriched with benefits? Making your Ninja Creami Salted Caramel Ice Cream is not only a fun culinary adventure but also a balanced way to enjoy dessert. Want to dive deeper into healthy eating? Check out resources like Healthline for more tips!
FAQs about Ninja Creami Salted Caramel Ice Cream
What is a Ninja Creami and how does it work?
The Ninja Creami is a revolutionary kitchen appliance designed to make homemade ice creams, gelatos, and sorbets with minimal effort. It works by transforming frozen bases into ice cream by mixing air into the ingredients while also incorporating flavors evenly. Simply freeze your desired mix overnight in the provided container, then insert it into the Ninja Creami. With just a press of a button, you’ll have silky, rich Ninja Creami salted caramel ice cream ready to enjoy!
Can I use regular protein powder instead of the suggested type?
While it’s tempting to swap in any protein powder you have on hand, using a neutral-flavored protein powder will yield the best results for your Ninja Creami salted caramel ice cream. Some protein powders can have distinct flavors or textures that might alter the creaminess of your ice cream. Stick to options that blend seamlessly into the mix—whey or plant-based powders designed for shakes work well!
How to store leftover ice cream properly?
If you’re lucky enough to have some Ninja Creami salted caramel ice cream left over, be sure to store it correctly to retain its creamy texture. Transfer the ice cream into an airtight container and smooth out the top to prevent air contact. For best results, store it in the back of your freezer, where the temperature is most consistent. This way, it’ll be ready for a tasty treat whenever a craving strikes!
For additional tips on storing homemade ice cream, check out resources like Serious Eats or Food Network. Happy freezing!
Conclusion on Ninja Creami Salted Caramel Ice Cream
In summary, making your own Ninja Creami Salted Caramel Ice Cream offers countless benefits—from knowing exactly what goes into your treat to experimenting with flavors that excite your palate. Homemade ice cream is not only a fun project but also a rewarding experience, especially when you get to share it with friends and family. Why not give this creamy, indulgent recipe a try?
The satisfaction of creating your own dessert is hard to match. So, grab your Ninja Creami, gather your ingredients, and dive into this delicious journey of flavors. You won’t regret it! For more ice cream inspirations, check out Ice Cream Nation and transform your summer dessert game.
PrintNinja Creami Salted Caramel Ice Cream: The Best Homemade Treat

Learn how to make delicious Ninja Creami Salted Caramel Ice Cream in your own kitchen!
- Prep Time: 10 minutes
- Total Time: 24 hours 10 minutes
- Yield: 6 servings 1x
- Category: Dessert
- Method: Churning
- Cuisine: American
- Diet: Vegetarian
Ingredients
- 2 cups heavy cream
- 1 cup whole milk
- 1 cup brown sugar
- 1 teaspoon sea salt
- 1 tablespoon vanilla extract
- 1/2 cup caramel sauce
Instructions
- In a bowl, whisk together heavy cream, whole milk, brown sugar, sea salt, and vanilla extract until the sugar is dissolved.
- Pour the mixture into the Ninja Creami container and freeze for at least 24 hours.
- After freezing, process the mixture using the Ninja Creami according to manufacturer instructions.
- Drizzle caramel sauce into the processed ice cream and mix gently.
- Scoop and serve immediately or re-freeze for a firmer texture.
Notes
- For extra flavor, add crushed pretzels or chocolate chips.
- Adjust the salt to taste for a sweeter or saltier ice cream.
Nutrition
- Serving Size: 1/2 cup
- Calories: 300
- Sugar: 25g
- Sodium: 150mg
- Fat: 20g
- Saturated Fat: 12g
- Unsaturated Fat: 7g
- Trans Fat: 0g
- Carbohydrates: 30g
- Fiber: 0g
- Protein: 3g
- Cholesterol: 80mg
Keywords: Ninja Creami Salted Caramel Ice Cream, homemade ice cream, dessert